Four Airflow Values You’ll Use Daily
Airflow is an essential measurement to diagnose HVAC equipment, system, comfort, and efficiency problems. Before you troubleshoot, you’d benefit from understanding the related airflow application, how it affects the system, and how you can measure it.
Airflow is a general term that’s easy to misinterpret. When I first learned about airflow, I had to classify it into four values that made sense to me. The easiest options are the measurement location or source of the airflow reading.
Once you understand the four airflow values, how they tie together, and the variations between them, you can systematically eliminate each as a potential suspect when solving a problem. Let’s look at four airflow values you can use daily and the opportunities they provide.
REQUIRED AIRFLOW
Before you measure airflow, you need to know how much the system needs. This is called required airflow. It establishes a target to aim for. There are many applications for required airflow, the most common being fan airflow. Other applications include individual room airflow and outside air.
Required fan airflow depends on various factors like elevation and equipment application. To keep this simple, most technicians stick to basic industry standards. One resource I’d like to offer is the National Comfort Institutes’s (NCI’s) Required Fan Airflow Quick Reference. If you would like a PDF copy, send me an email request at the address at the top of the page.
Required room airflow is tricky to determine due to the variables that affect room heat loss and gain. A proper room-by-room load calculation is the most accurate way to make this determination. Many contractors also estimate room airflow with their customers. This process involves the customer in the redesign of their system and creates a desire in them to solve their comfort problems.
Required outside airflow is a value we often overlook. HVAC system ventilation is typically left to building leakage and open windows. This approach rarely gets the job done and creates huge opportunities for contractors who look for it. Old outside air design rules are 15 cfm per occupant. Recent code changes take a different approach and allow airflow values for the occupants and the building.
Looking for quick answers on air conditioning, heating and refrigeration topics? Try Ask ACHR NEWS, our new smart AI search tool. Ask ACHR NEWS
Know required fan and room airflow before you begin to measure. This information is the baseline that you will compare all your measurements against. Comparing design airflow to measured airflow enables you and your customers to quickly understand the meaning of each reading.
FAN AIRFLOW
Once you establish required airflow, you need to compare it against what happens at the air-moving equipment. Fan airflow is the second value you need to understand. It’s the foundation of proper system operation. If it is incorrect, everything else will also be incorrect.
Every system is a little different and must be treated that way. Contrary to popular belief, fan airflow isn’t automatically set at the factory. Don’t assume high speed for cooling and low speed for heating — those days are long gone. You must set fan airflow to manufacturer specifications on each installation to ensure correct and trouble-free operation.
The quickest and easiest way to determine fan airflow is to plot it on the manufacturer fan tables found in most installation instructions. The fan-speed setting and measured total external static pressure (TESP) are two pieces of information you’ll need for it. Find these two points on the fan table and intersect them to determine fan airflow. It’s important to note that the blower must be clean. If it is dirty, clean it first, and then proceed with your tests.
Since fan airflow measurement is rarely perfect, there is usually a tolerance most standards allow. The most common value is ±10 percent of required airflow. It’s best practice to get as close to required airflow as possible, but there are times when this isn’t possible. The percentage allows you some cushion in those situations.
You can see the importance of fan airflow measurement on systems that pair 5-ton blowers and 3-ton condensers. These systems often suffer from excessive noise and poor comfort because they are left in the default airflow position. The fan tries to push 2,000 cfm through a coil designed for 1,200 cfm. The fix is to lower the blower speed so the proper airflow moves across the coil and heat exchanger. How many systems around the country currently operate in this condition?
When you start measuring fan airflow, you’ll uncover the source of many service headaches that disappear once the fan is set correctly.
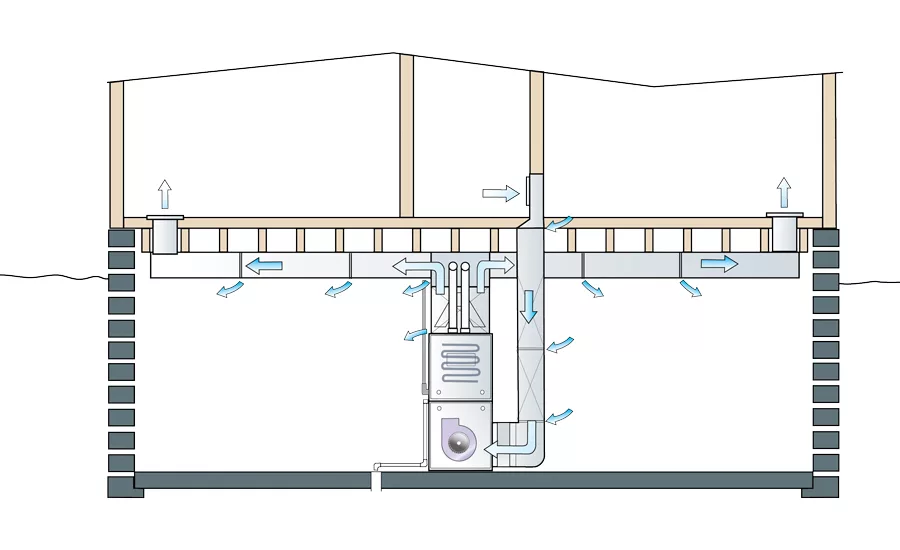
DELIVERED AIRFLOW
Once fan airflow is set to manufacturer specifications, you need to look at delivered airflow. It is what delivers comfort and efficiency into the living space and determines true system performance.
Unfortunately, our industry has become a little too confident in design, and we assume that delivered airflow automatically happens. We think if the airflow value is from a computer program or a decades-old table, it must be correct. A 6-inch duct always delivers 100 cfm, right? Delivered airflow measurement has repeatedly proven these assumptions couldn’t be further from reality.
Delivered airflow is measured with a good-quality balancing hood and rotating vane anemometer. The balancing hood is the main test instrument you will use. The anemometer measures grilles and registers you can’t access with the hood.
If you have required room airflow values, you can compare design airflow to measured airflow — what it truly delivered. If measured airflow isn’t within ±10 percent of design, you have some work to do. After all supply registers are measured, add all their airflow values to determine total delivered supply airflow into the living space. It should be within ±10 precent of required and measured fan airflow. You can follow the same process for return grille measurements.
It’s common to notice a slight difference in plotted fan airflow and total delivered airflow. The variance is due to different measurement methods and test instruments. Don’t assume a discrepancy in airflow readings is completely due to duct leakage — it might be variations in your readings.
Delivered airflow measurement moves you beyond your competition and allows you to see hidden defects only found through testing. If you want to see how your systems work in the real world, measure airflow into the living space.
OUTSIDE AIR
The last airflow to understand is outside air. It provides HVAC system ventilation needs when brought in from an acceptable location. Many contractors avoid this essential airflow because they fear how it will impact the system and are unsure how to offer it as an option.
To counteract these doubts, many assume that building leakage provides enough ventilation for the customer’s needs. Rarely does this work, especially in newer homes that are tightly constructed. The other forgotten aspect is the outside air source.
Outside air can enter a system intentionally, such as through a dedicated outside air duct, economizer, energy recovery ventilator (ERV), heat recovery ventilator (HRV), or ventilating dehumidifier. It can also be brought into a system unintentionally through duct leakage or pressure imbalances. Air from an intentional source comes in through a known location. If air enters from an unintended location, you’ll have no idea where the source of that air is. Your customers could breathe air from a crawlspace or attic just as easily as from windows and doors.
You can measure intentional outside air with a traverse. The source will determine if you need to traverse with a thermal or a rotating vane anemometer — each application is different. You can traverse a dedicated duct with a thermal anemometer or traverse an economizer inlet with a rotating vane anemometer.
Unintentional outside air measurement is tied to both the duct system and building leakage. If you measure these interactions, you’ll need special test equipment that measures leakage with calibrated fans and gauges.
You can provide a new type of service and solve many comfort complaints when you add intentional outside air and offer your customers a healthy air source. Don’t assume where the outside air is coming from.
THE OPPORTUNITY WITH AIRFLOW
The four airflow values in this article offer a different opportunity for you. If our industry would only take advantage of the first two airflow values, we would see a significant improvement in callbacks, warranty costs, and customer complaints. Add in the third and fourth airflow values, and you begin a comfort revolution.
To add these airflow values to your services, start with required airflow. Email me for the Required Airflow Table and see where you need to be. Next, begin to measure fan airflow. The problems you discover and solve with this single addition will surprise you.
Once you have a good grasp on this, take it up another notch and add delivered airflow. See what happens on a room-by-room basis. Finally, offer outside air to your systems and provide the best ventilation you can for your customers. Each airflow measurement is a building block to provide true comfort and efficiency from your systems. With a little imagination, you can apply this knowledge daily to provide the solutions your customers want and need.
Publication date: 9/24/2018
Want more HVAC industry news and information? Join The NEWS on Facebook, Twitter, and LinkedIn today!
Looking for a reprint of this article?
From high-res PDFs to custom plaques, order your copy today!


