Don’t Tuck Duct Issues Into the Install
Updated attitudes and upfront adjustments can insulate these jobs from a host of problems.
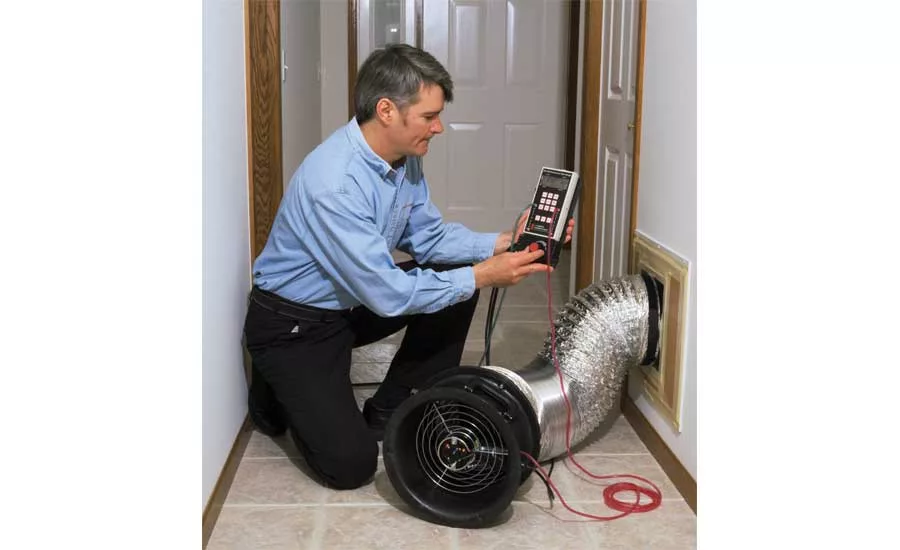
NO-LEAK POLICY: Here, a technician performs a leakage test. While some leakage was once commonly chalked up to heating the basement a little bit, those days are gone. “Now,” says Hank Artlip, “if you want to heat the basement, put a lead in the basement.” Image courtesy ket555, CC BY-SA 4.0
The owner has bought into the project, the contract has been signed, and the design has been designed. Today is ductwork day.
For best results, National Comfort Institute curriculum developer and trainer David Richardson says the smart work starts back at the office.
“Have a floor plan already drawn up, with a full scope of work listed out,” he recommended.
Maybe the site is new construction, or perhaps it’s a retrofit that requires some ductwork replacement. Hank Artlip, president of SMACNA member Artlip and Sons in Aurora, Illinois, gives the slight advantage to replacement projects since contractors have a physical structure to evaluate, and “you also have the advantage of discussing historical data with the homeowner or building owner.”
Richardson also emphasized the value of taking that time on the front end — with both the homeowner and the on-site team. If the customer has invested in any duct upgrades, make sure the installation team is clear about those, he said.
“Do a walk-through with the install team and homeowner to ensure that all parties are on the same page,” Richardson said.
Part of that conversation should be doublechecking with the customer about any of those aforementioned upgrades, but this step’s value goes beyond that.
Looking for quick answers on air conditioning, heating and refrigeration topics? Try Ask ACHR NEWS, our new smart AI search tool. Ask ACHR NEWS
“A lot of hidden concerns and issues get discovered during this step that are typically easy to correct.”
Found or raised after work gets underway … maybe not so easy.
With walkthrough complete, the next thing that needs to get into place isn’t metal. For upgrades where the work is inside the building, such as a basement, use drop cloths and plastic sheeting to isolate different rooms. When it comes to ductwork removal, Richardson advises putting it in bags or plastic whenever possible.
“You don’t want years of accumulated nasty stuff from the old ducts drifting into other areas of the building,” he explained. “Do your best to minimize dirt and dust moving around.”
Flexing Skills
Once work begins, the materials may include flex duct. In a May 2020 blog post, HVAC School’s Bryan Orr quoted fellow HVAC trainer Jack Rise.
“There’s a lot of problems with flex duct. It’s a good product, but we abuse it ... it’s just poorly handled.”

DO NOT DO A KNOT: National Comfort Institute’s David Richardson recommends long, sweeping turns when duct has to change direction.
One common way contractors can inadvertently sabotage performance is by not extending flex duct properly before or during installation. Orr wrote that according to Air Duct Council data, allowing 30% compression in flex duct can result in four times the air resistance.
“Some guidelines suggest pulling a 25-foot piece of flex fully extended for one full minute before attempting to install it,” Orr said. This reduces not only compression but also the depth for the corrugation.
Richardson noted the need to properly support flex duct as well once it is in place, and to execute long, sweeping turns when any duct has to change direction.
“A big mistake is to assume that air can make a sharp, 90-degree turn” he said.
While the common bit of leftover flex that isn’t really needed for a given run might seem innocuous enough, Orr would like to dispel misconception about that, too.
“Cutting off that 2 to 6 feet of extra flex on the end, instead of just using the whole bag, can mean the difference between a good and a poor duct system in many cases,” he said.
Install Tips
Regarding best practices elsewhere in duct installation, Artlip singled out the return air coming back to the furnace as critical. Keep an eye out for potential hindrances to that airflow. That air moves a little easier than the supply air, he said. However a team finds the existing furnace, or when they might need to turn a new furnace to connect to existing supply, he said, be careful not to put a fitting into the space that will have a restrictive effect.
For metal duct, Artlip added, be mindful of S-cleats or drive cleats that can also impede airflow when they are located in the corners.
Asked for a similar tip, Richardson tapped supply registers as a target for a potentially easy fix.
“Their importance in room air mixing is underestimated,” he said. “You can greatly increase room comfort in many homes just by replacing a poor supply register that doesn’t throw and spread air properly.”
Richardson’s bonus tip for this part of the discussion: Pre-insulate ducts on the ground.
What’s Your Leak Tolerance?
“The mentality used to be that what little bit of loss you have, it isn’t a huge deal,” Artlip recalled. “If you’ve got a little loss in the basement, the thought was ‘OK, you’re heating the basement a little bit.’”
But now, he said, thanks to modern energy codes, that attitude has changed. Leakage is bad, period. If you want to heat the basement, then put a lead in the basement.
“I didn’t (use to) see it as a big issue,” Artlip said, “but when you see the data behind it, you understand where it makes sense to seal that stuff off.”
Richardson added that “all too often, we focus on the large duct leaks but forget about the smaller ones.”
And it isn’t just the ducts. Orr reminded contractors that the connections also need to be well-sealed.
For flex duct, he says, that means mastic. Orr recommends fully sealing them and then allowing the inner liner to dry before pulling the insulation over the connection.
“Also keep in mind that leaks where the boot can meet the ceiling are very common leak points,” Orr wrote. “It’s a good idea to seal them from the inside and/or outside to the final floor or ceiling before installing the grilles.”
Parting Words
Leaks represent a costly and well-known culprit, Orr continued, but he sees many companies focusing on sealing while neglecting the strapping that prevents sagging ducts and associated issues. Orr reminded that the allowable amount of sag is a scant half-inch per 4 feet of length.
“Don’t only rely on the code-required strapping in your jurisdiction,” he cautioned. “Just because a system passes inspection doesn’t mean it’s installed correctly.”
Meanwhile, Artlip advises contractors to stay aware of little things that can come up when replacing an old furnace with a new one.
“A lot of your newer furnaces are shorter than the older version,” he said. “So maybe you’re going from an 80% efficient furnace to a 90%, and now all of a sudden, you’ve got a vent with PVC out of a sidewall instead of tying into an existing chimney. Every job is a little different.”
Speaking of furnaces, Artlip also finds that newer units can sometimes be a little more sensitive to an imperfect environment. He attributes this to the assortment of safeties and sensors newer units often employ. As a result, a new unit might balk at a level of airflow or an undersized duct situation, whereas the older unit may have “had a little more latitude in its operation.”
On the convenient side, Artlip noted how the longstanding tradition of oversizing in older systems has meant that the installation of a new furnace often does not create the need for duct replacement that it might have otherwise.
NCI’s Richardson also points out that a good process, plan of attack, installation checklist, and a scope of work can minimize or just avoid altogether many of the potential problems in this type of work. Richardson concluded with one last piece of advice.
“Treat the ducts like water pipes, and you’ll think about duct leaks differently.”
Looking for a reprint of this article?
From high-res PDFs to custom plaques, order your copy today!


