Brazing and soldering practices are one of many areas in the HVACR field where what is commonly practiced isn’t what’s best, and what’s taught doesn’t apply in all cases. Let’s start with the basics.
SOLDERING VERSUS BRAZING
When the liquid temperature (liquidus) of the alloy (rod or wire) you are using is 840°F or lower, the process is considered soldering. Brazing occurs when the liquid temperature of the alloy is above 840°.
Sometimes, we will refer to silver bearing rods as “silver solder” even when the liquidus temperature is above 840°. This misnomer falls into the “who cares” category for most of us in the field, but most manufacturers label them as a “brazing alloy” or “filler alloy” rather than solder because the liquidus temperature is in the 840°-plus brazing range.
TECHNIQUE
When brazing or soldering tubing, we have a few things we need to accomplish to make a proper connection.
First, when heating the joint or patch, we must not overheat the base metal or the flux (where applicable).
We need to heat the entire joint above the melting temperature of the brazing alloy to draw the alloy deep into the joint. Common mistakes involving incorrect heating of the joint include underheating, overheating, or taking too long to complete a joint because visual cues aren’t used to apply the alloy at the proper time. Results include ugly blobs of alloy or “cap joints” if the heat is focused too much on the edge of the joint rather than pulling the liquid alloy deep into the joint.
Every base metal and alloy responds a little differently, but we always use indicators of some sort to know when to increase or reduce heat and when to apply the alloy based on the work we are doing.
Some things you need to know before making a connection:
- What is the melting temperature of the base metal?
- What is the working temperature of the alloy?
- Is flux required? If so, is it applied externally or integral to the alloy you are using?
- Are we making a joint or a patch?
- Do we have the proper clearances for the joint?
- Are the torch and alloy we are planning to use appropriate for the task at hand?
While we don’t have room here to cover all these questions in detail, the best place to start is the technical facts for the brazing alloys you use, as well as a solid understanding of what you are attempting to accomplish.
REPAIR (PATCHING) VERSUS CONNECTION
Most HVACR connections involve a male-to-female joint in tubing using a fitting or swage. The proper outcome in a connection is to heat the base material to the point that the alloy will flow into the joint and bond the materials together throughout the entire joint.

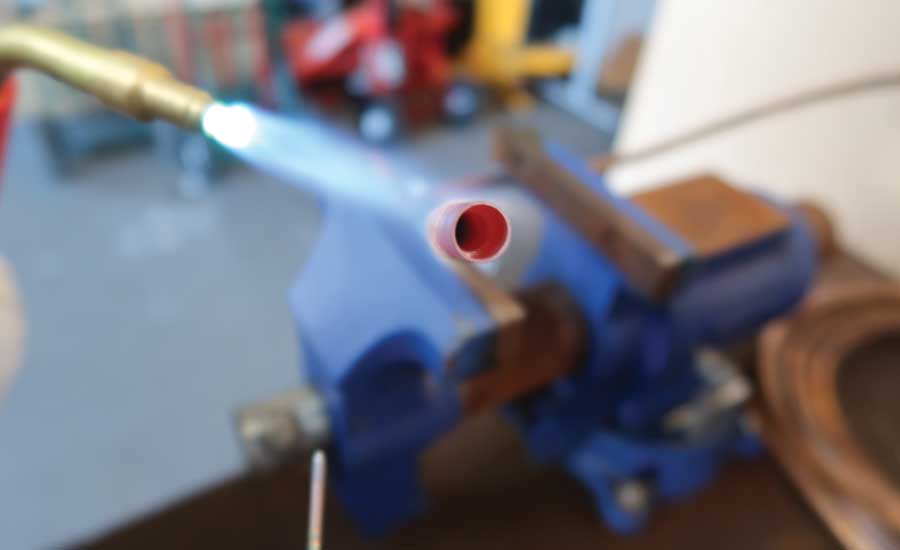
THE USUAL SUSPECT: Most connections made in HVACR involve a male-to-female joint in tubing using a fitting or swage.

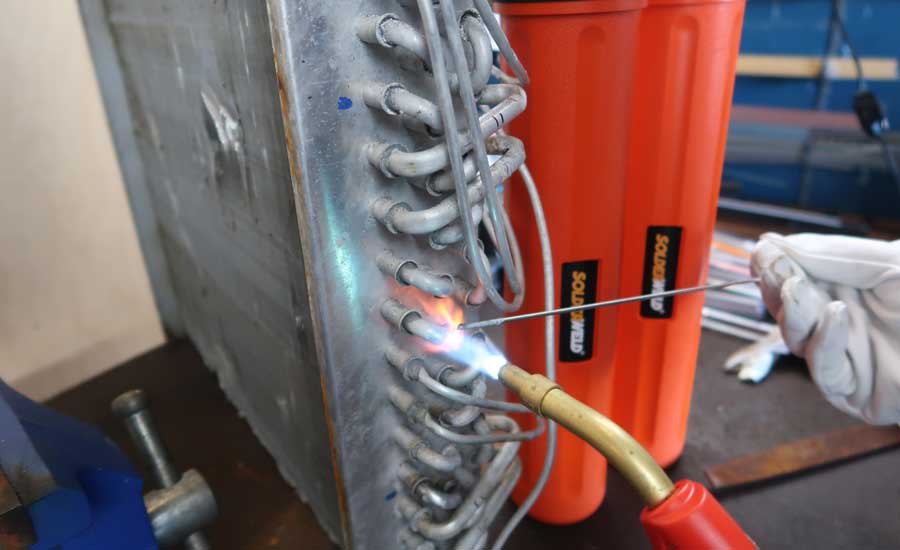
NO FLOW: In some situations, we need to patch a leak on the surface of tubing or a micro-channel coil without “flowing” it into the tubing.
A repair should be done by cutting out a damaged portion of tubing, using a swage tool or couplings to insert a new piece of tubing whenever practical, and then using typical connection techniques. In some situations, we need to patch a leak on the surface of tubing or a micro-channel coil. In these circumstances, we want to bond the alloy to the surface of the base metal without “flowing” it into the tubing.
Flowing an alloy into the tubing can block the tubing. This type of repair should not be attempted in high-stress areas like compressor discharge lines, but I’ve made hundreds of successful patch repairs in my career in coils and on u-bends, especially in the case of rub-out leaks.
Making this sort of patch repair requires delicate heat control to keep the alloy at the ideal viscosity (thickness) to bridge the compromised area without falling into or pulling into the gap.
BASE METAL TEMPERATURE
Most metals we work with will respond to heat in the same way with a color change, as shown in Figure 1. Notably, aluminum will show no change in color before it hits its melting point, making it especially challenging to braze or solder without using a flux that acts as an indicator. You need to know the working temperature of the alloy you are using as well as the melting temperature of the base metal — only apply the alloy after heating the base metal to a temperature within that range.
| Approximate Base Metal Temperature | |||
| °F | °C | °K | |
| Faint Red | 930 | 500 | 770 |
| Blood Red | 1075 | 580 | 855 |
| Dark Cherry | 1175 | 635 | 910 |
| Medium Cherry | 1275 | 0690 | 0965 |
| Cherry | 1375 | 0745 | 1020 |
| Bright Cherry | 1450 | 0790 | 1060 |
| Salmon | 1550 | 0845 | 1115 |
| Dark Orange | 1630 | 0890 | 1160 |
| Orange | 1725 | 0940 | 1215 |
| Lemon | 1830 | 1000 | 1270 |
| Light Yellow | 1975 | 1080 | 1355 |
| White | 2200 | 1205 | 1480 |
Figure 1: This chart shows how most metals respond to heat with a color change.
Choosing a proper torch and tip is important. Generally, you’ll select the torch type based on the temperature of the alloy being used and the tip based on the size of the work.
For example:
- Oxygen/acetylene torches are best for work above the 600° range to over 2,500° (the melting temperature of steel).
- Air/acetylene torches are effective from 350° to 1,300° in general practice, making it practical for most HVACR soldering and brazing applications.
- Mapp Gas or propane is generally practical for work less than 700°, which makes it a good option for low-temp soldering but generally impractical for brazing.
 |
 |
|
| Air-Swirl (acetylene) | Oxy-acetylene | |
| Target Heat | 2700° F | 4700° F |
| Time to temperature for base material | Slower | Faster |
| Simplicity and speed of setting neutral flame | Simpler and faster Air-fuel ratio automatically set | Slower - Requires balancing fuel and oxygen flow |
| Concerns about burning through the pipe | Lower | Slightly higher |
| Concerns about heating downstream components | Slightly higher | Lower |
| Braze and solder | Yes | Yes |
| Cut and weld steel | No | Yes |
| Wrap around flame | Yes | No |
| Flame blown out by wind | No | No |
| Equipment costs | Generally lower | Higher |
| Equipment costs | Generally lower | Higher |
| Cylinders to carry | 1 | 2 |
| Oxygen required | No | Yes |
| Combustion hazards related to pure oxygen | None | Yes |
| Acetylene use | Generally lower | Generally higher |
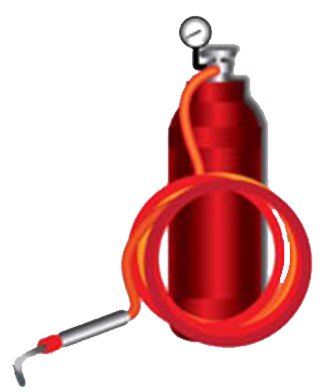
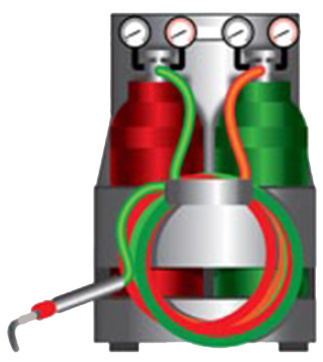
COMPARE AND CONTRAST: Note the differences between acetylene and oxy-acetylene flames.
Keep in mind that these temperatures are not the flame temperature but rather the temperature that the flame can typically be relied upon to heat the base material to in a reasonable time frame.
Select tip sizes, rig sizes, and fuel pressure ratios (where applicable) based on the manufacturer’s specs for the torch and the diameter of the tubing you are joining or patching.
WHAT IS FLUX?
Flux for soldering, brazing, and welding is a powder, paste, or liquid that is added to the base material being bonded. It is introduced either by direct application or as part of the rod or wire being applied.
Flux can do a few different things to improve the bond, but its main purpose is to bond with metal oxides and keep them out of the work area.
WHAT ARE OXIDES?
Oxides are compounds that result from one material (in this case metal) reacting with oxygen to create a new substance. Some common oxides are rust in steel or iron and the black scale that appears on copper when you heat it above about 500°. This is called “cupric oxide,” and it likes to block screens and valves.
When soldering, brazing, and welding, we often heat base metals enough that they’ll easily break down and start to bond with oxygen to form these nasty oxides. For this reason, you should always flow nitrogen in the lines when heating copper above 500°. The nitrogen displaces the oxygen, preventing the buildup of that black scale.
The layer of oxides that form on the outside of a joint can reduce the strength of the bond between the alloy and the base metal; it can even completely prevent bonding.
The most common purpose for flux is to keep those oxides out of the way so that the bond can be made. Flux isn’t a replacement for proper cleaning and heat control, but in many cases, it’s a necessity to deal with oxides.
Another benefit of specialty fluxes is that they can serve as an indicator of proper brazing temperature. Generally, the fluxes will turn a specific color or will go flat and smooth when the proper temperature is reached. Each flux is a little different, but they all provide an important indicator and are especially helpful in low-temperature and temperature-critical applications.
Flux is not always required. In sil/phos brazing, the phosphorus acts as the fluxing agent. Phosphorous-bearing alloys, however, only work with some base metals. They are incompatible with steel.
Fluxes must be used according to manufacturer specs. Some emit toxic vapors and require respiratory protection, and in most cases, residual flux should be cleaned off after the bond is made.
SELECTING AN ALLOY
A good HVACR connection alloy should form an extremely strong bond to the base material that can withstand the highest possible pressures, temperatures, thermal cycling (temperature changes), and vibration for the application. When choosing an alloy and technique, it’s important to consider worst case scenarios, such as short cycling or condenser fan motor failure, and not just typical running conditions.
While manufacturer’s specs should be referenced, it’s also a good idea to get opinions from professionals whose work has stood the test of time when selecting an alloy.
COPPER TO COPPER
Copper-to-copper connec- tions require no flux when rods that contain phosphorus are used. Therefore, rods using a small amount of silver, with the remainder of the rod being made of copper and phosphorus, are common.
Some of these brazing alloys contain no silver at all, but keep in mind that higher silver content can result in a more durable bond as well as a better flow into the joint.
Most of these phos/copper alloys have a working temperature of around 1,200°, and copper has a melting temperature of around 1,950°. These rods should be applied to the joint or repair after the copper base metal is heated to the “cherry” color range, which corresponds with a temperature of 1,175° to 1,275°.
COPPER TO BRASS
Brass is a metal alloy that is made up of a mixture of copper and zinc and has a lower melting point than copper. However, because brass is ideal for casting, many valves and other refrigeration components are made of brass. It is preferable to use a high-silver-content alloy with either an external flux or a flux-coated rod like the Solderweld 56% rod, which is what we typically use.
Apply heat to both sides of the joint until you see the proper color primarily on the copper and, to a lesser extent, in the brass as well. The flux will also act as an indicator because it will turn completely clear and flat, giving both base metals a “wetted” look at about 1,100° (for most appropriate fluxes). Both the color change and the clear flux can act as indicators that the correct temperature for a copper to brass joint has been reached.
COPPER OR BRASS TO STEEL
Working with copper or brass to steel will require a brazing alloy with no phosphorus and flux. Steel changes color in much the same way as copper, but it has less thermal conductivity, which means that the heat you apply tends to concentrate in that spot rather than being conducted out to a larger area the way it does with copper. Steel doesn’t melt until it reaches 2,500°, but the working range for the flux is generally 1,100° to 1,600° (depending on brand/type), so the flux can easily be overheated when working with steel. Additionally, it isn’t difficult to bump into the copper melting temperature of 1,950° if you aren’t careful.
When working with copper or brass to steel, the brazing temperature indicators to use include a metal color in that “cherry” range and quiet (bubble-free), clear flux.
ALUMINUM
Aluminum presents no visible indication of when it’s going to melt, which makes it trickier to work with. It also melts at a relatively low temperature of 1,220°, which means that if you’re bonding aluminum to other metals, the aluminum is at risk of melting as soon as any redness appears in the other metals. When brazing aluminum to aluminum, patching aluminum, or working with aluminum to other metals, you need to rely heavily on the aluminum flux to indicate when it is time to apply the alloy. For aluminum-to-aluminum work, use an application-specific aluminum repair rod like Alloy Sol from Solderweld. Alloy Sol is ideal because you can apply as much flux as you need, and it gives you a great indication of when to start applying the rod when the flux goes clear at around 600°.
Cleaning aluminum joints is generally critical for a long-lasting bond and is best done in two steps. First, clean with a solvent degreaser (acetone, methyl ethel ketone, lacquer thinner, and toluene are good choices) and lint-free cloth. Next, brush away any oxides present with a dedicated, clean, soft-bristle brush (I prefer a stainless bristle). The area should also be kept dry, as aluminum will oxidize quickly when water is present.
Sometimes, this cleaning process may not be practical, and I’ve have good luck getting a bond using Alloy Sol even on dirty aluminum, but refer to the installation instructions of the particular product you are using.
For aluminum-to-copper joints, you need to use alloys specifically designed for the purpose or low-temp solder that’s rated for aluminum and copper. My preference is Al-Cop braze because it has a flux built into a channel on the rod. The rod can be held to the joint, and the flux will melt and run out of the rod when the proper temperature is reached.
CONCLUSION
When making a repair or joint in any material, we are looking for visual cues to avoid overheating and damaging the base material, burning flux, or underheating and globbing partially melted alloy onto the joint.
To summarize:
- Clean tubing before cutting when possible. Sandcloth or a wire wheel on a drill both work well.
- Cut the tubing square using a properly sized cutter with a sharp cutting wheel.
- Deburr the tubing, ensuring that no shavings fall into the tubing.
- Fit the tubing together with proper clearances. Usually this means a very tight fit with no large gaps.
- Choose the correct alloy for the job at hand.
- Select the proper torch type and tip for the alloy and base metal as well as the size of the work.
- Purge with nitrogen, then flow nitrogen while brazing as a standard practice, especially if it’s possible that your base metal temperature will exceed 500° during the process.
- Protect the work area and system components from scorching or overheating.
- Use proper technique.
- Visually inspect the work for gaps or imperfections.
- Allow the alloy to cool slowly until it “sets” before applying wet rags or cleaning.
- Remove any scale or flux, pressurize the system with nitrogen to a safe level, and apply soap bubbles to each connection or patch to test for leaks.
Publication date: 12/24/2018
Want more HVAC industry news and information? Join The NEWS on Facebook, Twitter, and LinkedIn today!


Report Abusive Comment