HVAC Industry Leaders Offer Coil Troubleshooting Tips
There’s a variety of ways to identify the cause of failure and determine the solution
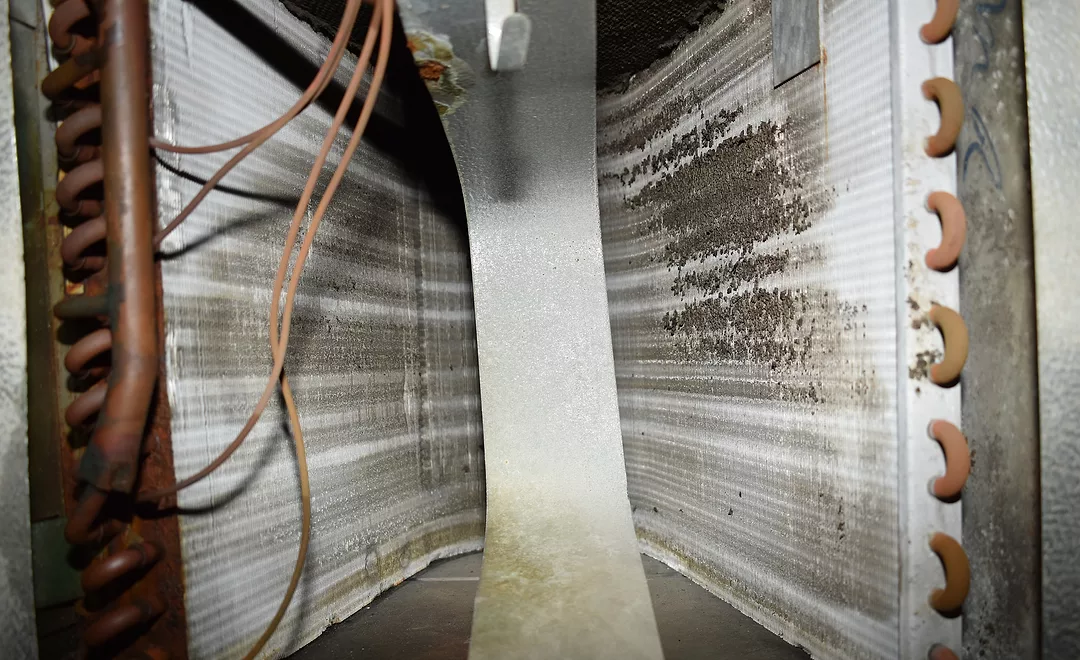
HISTORY IS KEY: Plano, Texas-based Samm’s Heating and Air Conditioning technicians are taught proper steps to ensure all other system components are operating as designed before attaching refrigerant gauges and assuming there is a leak. Knowing the history of the system is also key, Paul Sammataro, owner of the company, noted. Photo courtesy of Samm’s Heating and Air Conditioning
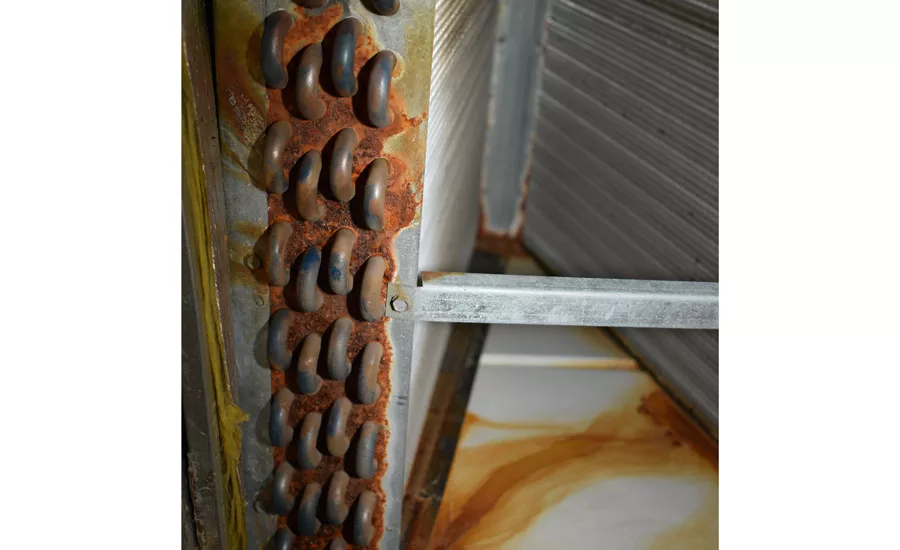
CAUSE OF FAILURE: Paul Sammataro, owner of Samm’s Heating and Air Conditioning in Plano, Texas, said the most common cause of failure he sees is corrosion. Photo courtesy of Samm’s Heating and Air Conditioning
For most homeowners, HVAC systems are out of sight and out of mind right up until the moment they stop working.
One common source of declining system performance lies in a unit’s coils. The NEWS recently talked with several industry leaders who shared their experiences, coil troubleshooting tips, and best practices to help identify and fix foiled coils.
CAUSE OF FAILURE
According to Dan Jacobs, vice president of sales, Capital Coil & Air, coils fail for a number of reasons, including coil plugging, vibration, corrosive environments, freeze ups, and poor system design.
“If filters are not changed or your HVAC coils are not properly cleaned in a timely manner, coils will actually act as filters,” Jacobs wrote in a recent blog post. “When dirt builds up on the coil, it will prevent heat transfer and can cause a 20-40 percent drop in performance. Dirt adds to the coil resistance and will absolutely cause your coil to fail prematurely. And, when your HVAC coils are installed near a moving piece of equipment, vibration can occur and cause leaks. The area where these leaks occur is very important and will clue you in to whether or not the problem is vibration.
“Corrosive environments refers to both the air in the environment and inside the tubes,” he continued. “This is very common in areas where there may be salt in the air. Additionally, most people think that when HVAC coils freeze, the water or condensate laying in the coil freezes into ice and expands, causing the tubes to bulge and eventually spring leaks. The coil freezes in multiple areas simultaneously, and it’s the pressure between these areas that causes the tubes to swell and eventually burst. These are very easy to spot as the leaks will run the length of the tube rather than around the tube.”
Jacobs called system design the No. 1 cause of failure.
“You would be amazed how many HVAC coils were never properly designed for their systems,” he said. “If there is a problem with the design, replacing the coil will only duplicate the problem. A high percentage of all the problems we encounter occur because the HVAC coils were built incorrectly or were never designed right in the first place. Sometimes owners want to improve performance by adding a couple of rows but don’t consider the air pressure drop or fluid pressure drop that comes with it.”
Looking for quick answers on air conditioning, heating and refrigeration topics? Try Ask ACHR NEWS, our new smart AI search tool. Ask ACHR NEWS
Paul Sammataro, owner of Samm’s Heating and Air Conditioning in Plano, Texas, said the most common cause of failure he sees is corrosion.
“On the older copper coils, corrosion of the two dissimilar metals has been the No. 1 cause of failure over the course of several years,” he explained. “Now, regarding newer coils, it is poor manufacturing or quality control, in my opinion. Coils should not be leaking in two to five years, and we see this more often than expected.”
Steve Wade, general manager, ARS/RescueRooter, Itasca, Illinois, said most coil failures are caused by refrigeration leaks, which, in turn, are caused by age, corrosion, or a source of excessive vibration.
“Older coils manufactured in the 1970s and 1980s are much more likely to fail due to corrosion while newer coils may become compromised by vibration,” Wade said. “Coils that fail prematurely to the lifetime expectancy of air conditioning systems may also be due to manufacturer defects as there are no mechanical moving parts in most evaporator coils.”
TROUBLESHOOTING TIPS
There are a number of ways to identify coil issues.
“Typically, a coil leak can be identified visually by the oil stains in either the pan or on the U tubes of the coil,” Sammataro said. “Other times, electronic leak detection is necessary and usually can be found in 15-30 minutes. If there are extremely small leaks, we perform isolation testing of the line set, coil, and outdoor unit. This is rarely needed but does occur a few times annually for hard-to-find leaks. The diagnosis of a leak takes place once the technician verifies the blower motor, filter, coil cleanliness, and pressures are correct. Finding low pressure, when all other checks have determined to be in proper operating conditions, leads you to the possibility of a leak. We first attempt to visually find the leak by obvious oil residue and then proceed, as needed, from there.
“Coil failure is not preventable,” he continued. “At some point, all systems/coils will leak. A coil’s life cycle can be maximized by proper charging from day one on the installation and proper maintenance of the indoor and outdoor system throughout the life of the system.”
Additionally, there are many different types of detection devices to determine the location of a refrigeration leak, Wade noted.
“The location of the coil and points of access help decide the best device to use,” he explained. “We’ve used electronic devices and soapy solutions [bubbles], but our preferred method is an injectable florescent dye that illuminates when bathed in violet light. This method reliably shows the location of the leak to best determine whether a repair is possible or replacement is required.
“Evaporator coil failure is not completely preventable, but an annual inspection will help identify factors that may hinder performance and longevity,” Wade continued. “A clean, unrestricted coil that drains properly without areas of corrosion is much more likely to see an extended life. An ultraviolet air purifier can also help prevent mold and organic growth on an evaporator coil to further maintain system efficiency and airflow.”
BEST PRACTICES
There are several best practices for technicians to follow when troubleshooting coils.
“One would be recognizing the environment they’re in,” said Jacobs. “Identify if there is salt in the air or other corrosive elements that can really eat away at the coil. When ordering the coil, you can specify stainless steel or simply use a coating for the coil itself. Coatings are almost always within the budget and only add about a week to the lead time. That will definitely increase longevity.”
Additionally, the coil should be kept as clean as possible, Jacobs noted.
“Most distributors sell combs to comb out coils,” he said. “After a few years, when you look at a coil from the air side, the fins, more or less, become filters. When that’s not clean, the air is obviously not getting through, and there’s not as much heat transfer. Using that tool once or twice a year to make sure the coil is as clean as possible optimizes efficiency and performance.”
Sammataro teaches his technicians the proper steps to ensure all other system components are operating as designed before attaching refrigerant gauges and saying, “It’s low. We have a leak.”
“Knowing the history is also key, if possible,” he said. “If refrigerant has been added before, odds are, if you are low again, the culprit is a leak. I also suggest using your senses when troubleshooting. Spotting oil residue can usually lead you quickly to the failure.”
Wade stressed the importance of annual inspections.
“An annual inspection determines the performance of the coil by measuring refrigerant temperatures and pressures and measuring the temperature drop across the coil,” he said. “Isolating and dampening vibration, checking for corrosion, and clearing the drain line of any obstructions will help increase the coil’s and the system’s life. Advanced troubleshooting may require the measurement and recording of pressure drop across the coil to determine if airflow has been restricted. In this case, the coil may need to be removed and cleaned to restore the correct airflow.”
Publication date: 6/12/2017
Want more HVAC industry news and information? Join The NEWS on Facebook, Twitter, and LinkedIn today!
Looking for a reprint of this article?
From high-res PDFs to custom plaques, order your copy today!


