Proper Brazing Can Lower Refrigeration Costs
Reducing and eliminating refrigerant leaks can help customers save money

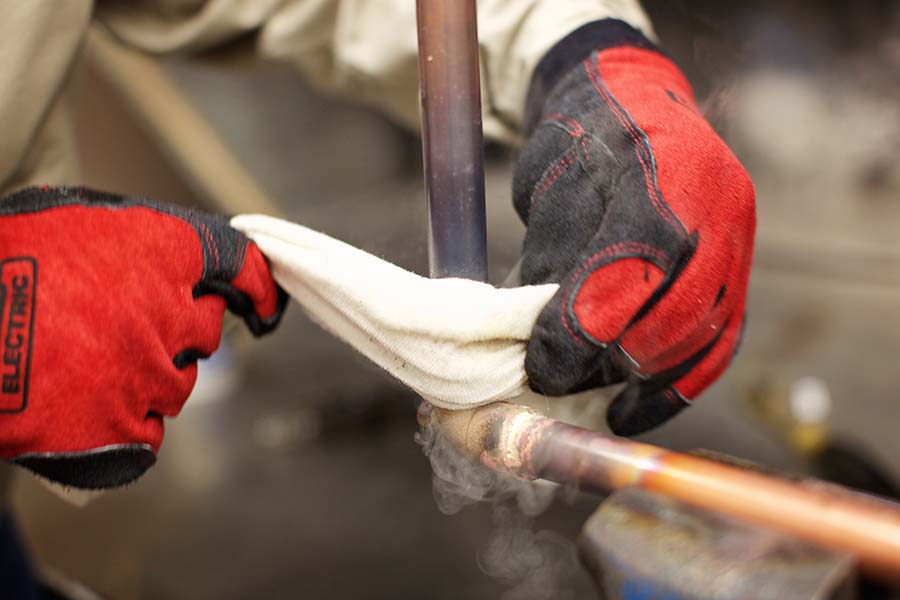
COPPER TUBES: During brazing heating, oxide scales form on the inside of copper tube, which can flake off into refrigerant and potentially clog small orifices. Flowing nitrogen through the tube can help prevent this. (Courtesy of Pixabay)
Any business that uses refrigeration is dealing with rising costs. The price of HFCs has increased dramatically over the last few years, and with the EPA phasedown of HFCs beginning this year, experts predict the replacement refrigerants will be more expensive, at least initially as they make their way into the marketplace.
While we cannot control pricing of current or future refrigerants, HVACR contractors can offer customers another solution to keep costs down: reducing and eliminating leaks. EPA studies indicate that the average grocery store has 3,500 pounds of refrigerant, with around 25% of that refrigerant lost to leaks every single year. That is basically money disappearing into thin air.
Refrigerant leaks can occur at numerous points along the journey from refrigerant source to the cooling cases. Common culprits are at pipe joints, compressor coils, and evaporator tubing, and tube sheet leaks at condensers. That’s where HVACR technicians can offer a solution to save their customers money: better brazing.
Why Brazing?
Poor brazing is a common source of refrigerant leaks. Getting it right the first time can not only save the time and money that frequent leaks cost, but it can help contractors to improve their service and allow technicians a chance to stand out because of their skills.
Many people in HVACR think brazing is easy, but to do it well takes time, skill, and attention to detail. HVACR techs may have been brazing for a long time but are not necessarily doing it correctly, making leaks more prevalent. Knowing the intricacies will make the difference between a good joint and a joint that just looks good. In my NATE-certified training classes, my goal is to teach techs to look for these issues.
When techs come to my training classes, we do a pressure test on the joint. Participants are surprised when it doesn’t hold up well. That’s why it’s important for techs to improve their brazing skills — even if they don’t think they need it.
An HVACR technician skilled in brazing can fix existing problems and, more importantly, prevent them from happening in the first place, during the installation. It is a skill that is often not given enough attention, but one that can make technicians invaluable to their customers.
Looking for quick answers on air conditioning, heating and refrigeration topics? Try Ask ACHR NEWS, our new smart AI search tool. Ask ACHR NEWS
Proper Brazing Techniques
What follows is a brief overview of our guide at Harris Products Group on how to properly braze. Our in-person, NATE-certified brazing classes are also available for those looking for hands-on instruction and guidance for proper technique.
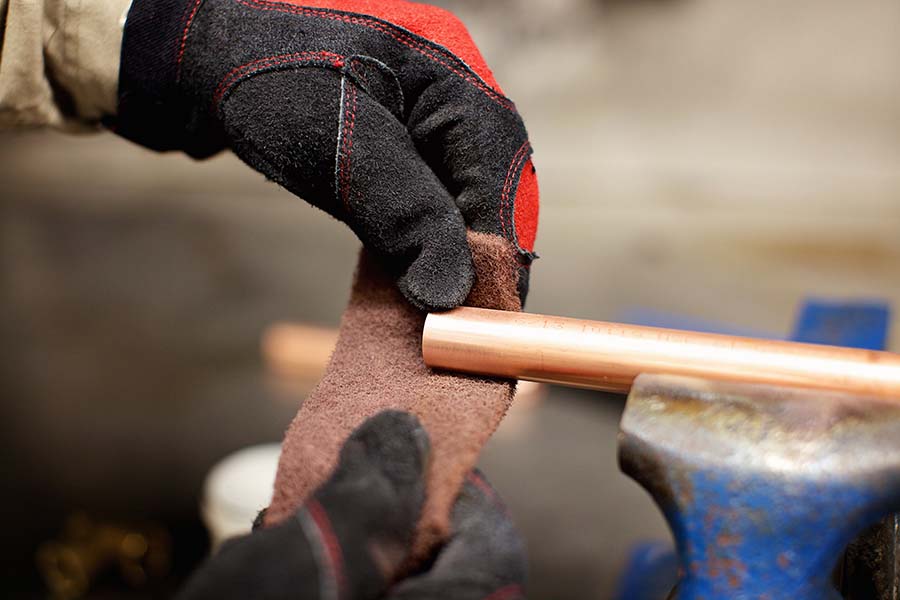
1. Cut Tube Square. With a cutter or a hacksaw, cut the tube to the exact length needed at a perfect 90° angle. To ensure a good fit, remove all inside and outside burrs and bring round tubes to true dimension and roundness.
STEP 1: With a cutter or a hacksaw, cut the tube to the exact length needed at a perfect 90-degree angle. (Courtesy of Harris Products Group, click to enlarge.)
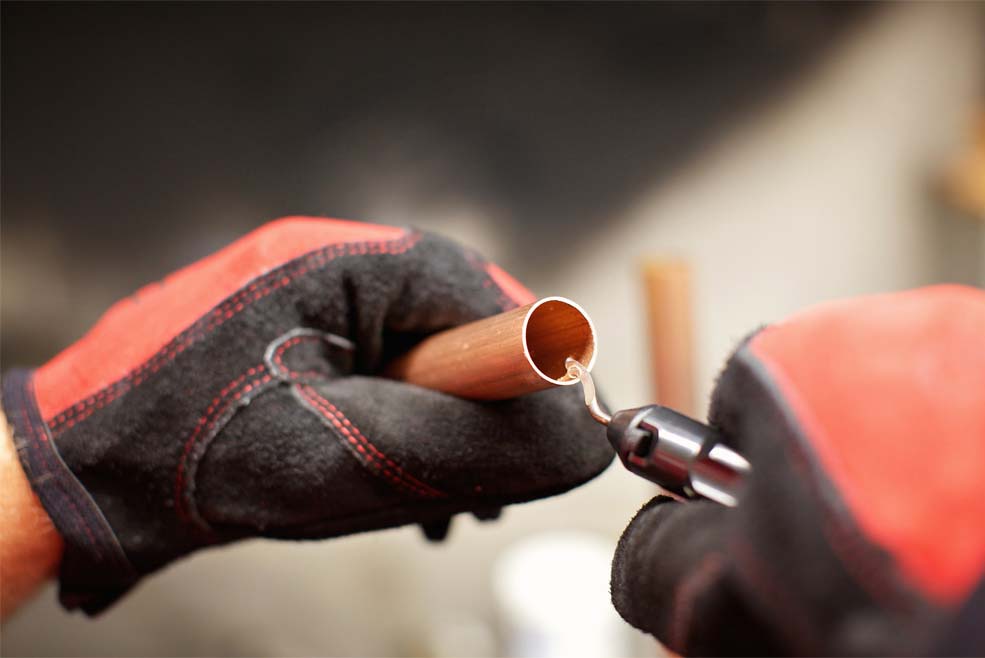
2. Clean Tube End and Inside Surface of Fitting. The joint surface areas must be clean and free from oil, grease, or oxide contamination. Clean using a stainless-steel wire brush, emery cloth, or scouring pad, then make sure to remove grease and any foreign particles.
STEP 2: The joint surface areas must be clean and free from oil, grease, or oxide contamination. (Courtesy of Harris Products Group)
3. Select Brazing Alloy. Make sure the correct alloy for the fittings is being used. Each metal has its own unique requirements in order to stay secure and leak-free, so always take great care to use the right brazing filler material for the job. For refrigeration, we recommend Stay-Silv® 15 for copper-to-copper connections and Safety-Silv 45T for dissimilar metal connections.
4. Perform Proper Fluxing. This step is important, because the flux absorbs oxides formed during heating and promotes the flow of filler material. Apply only a thin layer of flux to the male tubing, then insert it into the fitting and rotate once or twice if possible.
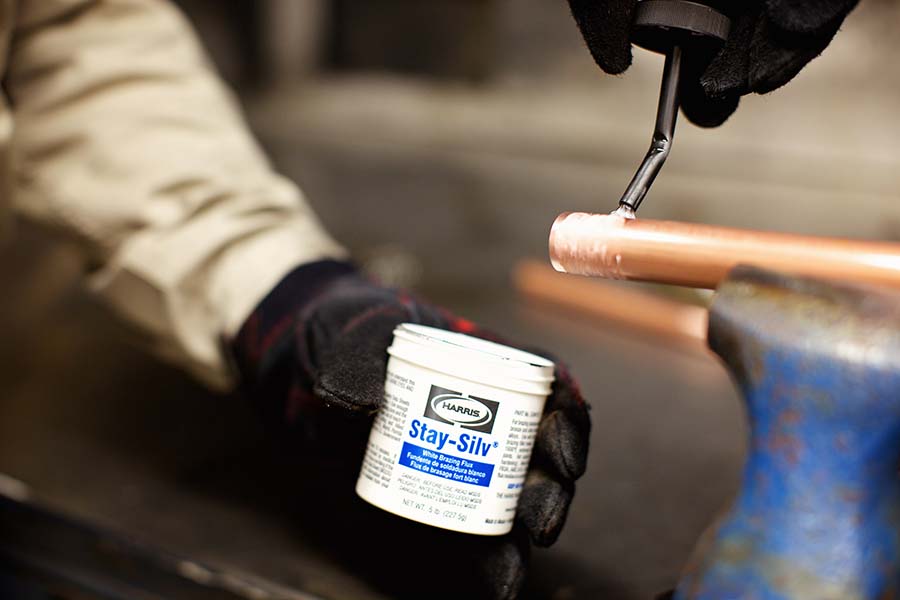
STEP 4: Proper fluxing is important, because the flux absorbs oxides formed during heating and promotes the flow of filler material. (Courtesy of Harris Products Group)
5. Choose the Fuel. For brazing of refrigerant lines, oxy-fuel kits that contain oxygen and acetylene are the recommended choice. When using these oxy-acetylene gases, a carburizing or neutral flame performs best. Avoid an oxidizing flame.
An oxy-acetylene flame produces the highest flame temperature with a more focused heat zone. Air-fuel is more commonly used in soldering, and we don’t recommend that product for refrigeration applications because it takes longer to braze and is less efficient for the tech.
6. Setting the Torch Pressure. With oxy-fuel kits, you’ll use two tanks: one for oxygen and one for acetylene. The pressure for each of the two gases should be the same. For example, on B-and MC-tanks, we recommend no more than 5 psi for Harris-brand torches and tips. Consult with the manufacturer to determine what pressure setting to use.
Next, open the regulator adjusting screw all the way by turning it clockwise.
7. Open the Torch Valve. Opening the torch valve about ¾ of a turn will provide sufficient fuel gas delivery. Do not try to reduce the flame by using the torch handle valve. Instead, change to a different tip size.
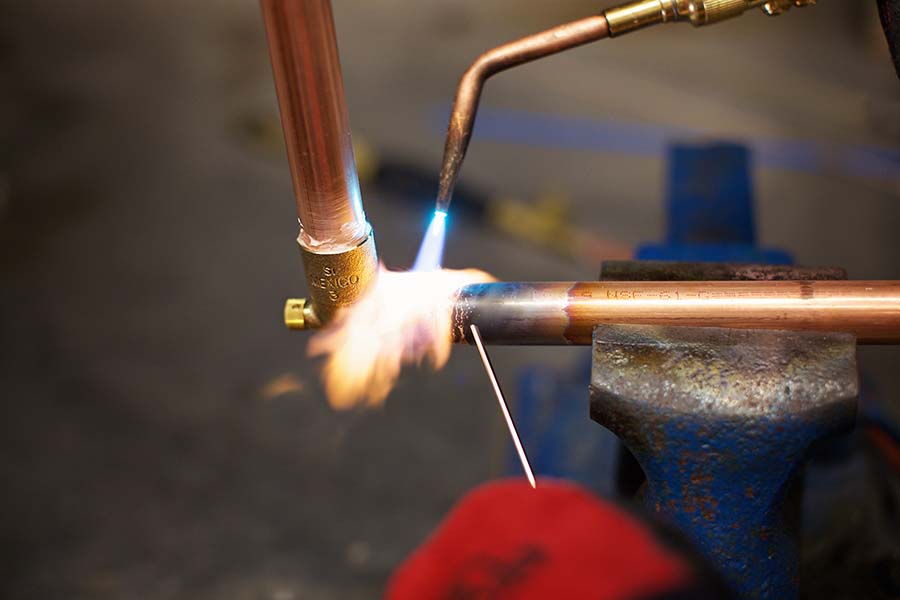
8. Heat the Joint Area. Always move the torch in short sweeping motions.
- Start heating the tube by first applying the flame at a point just adjacent to the fitting. Work the flame alternately around the tube and fitting to reach brazing temperature.
- When a flux is used, heat the tube until the flux passes the "bubbling" temperature range and becomes completely fluid and transparent and has the appearance of clear water.
- Direct the flame from the tube to the flange-base of the fitting and heat until the flux that remains in the fitting is also completely fluid.
- Sweep the flame back and forth along the axis of the assembled joint, tube, and fitting to get and then maintain uniform heat in both parts.

STEP 8: Heat the joint area by always moving the torch in short sweeping motions. (Courtesy of Harris Products Group)
9. Apply the Brazing Alloy. Feed the alloy into the joint between the tube and the fitting. Make sure the base metals have been heated to brazing temperatures before adding filler material. At this time, the flame may be momentarily deflected to the tip of the filler metal to begin the melting process.
Always keep both the fitting and the tube heated by playing the flame over the tube and the fitting as the brazing alloy is drawn into the joint. The brazing alloy will diffuse into all joint areas and fill them. Do not continue feeding brazing alloy after filling the joint area. Excess fillets do not improve the quality or dependability of a braze.
STEP 9: Feed the alloy into the joint between the tube and the fitting, making sure the base metals have been heated to brazing temperatures before adding filler material. (Courtesy of Harris Products Group)
10. After Finishing the Braze. Now that the brazing is completed, remove all flux residue in order to inspect the joint and perform a pressure test. A pressure test can identify a leak, saving both time and money for contractors, technicians, and customers. Immediately after the alloy sets, quench or apply a wet brush or swab to crack and remove the flux residue. Use an emery cloth or stainless-steel wire brush if necessary.
STEP 10: Once the brazing is completed, remove all flux residue in order to inspect the joint and perform a pressure test. (Courtesy of Harris Products Group)
A note on copper tubes: During brazing heating, oxide scales form on the inside of copper tube. These can flake off into refrigerant and potentially clog small orifices. HVACR installations routinely flow nitrogen through the tube during brazing to prevent internal scale formation. Use a low flow rate to avoid excess pressure inside the tube, and leave a small hole at the end line for the nitrogen to escape.
For businesses that seek to stop wasting money on refrigeration leaks, contractors who want to improve their customers’ satisfaction, or technicians who want to have a long, successful career, look no further than brazing. There is more to it than meets the eye, and the proof is in the bottom line.
Looking for a reprint of this article?
From high-res PDFs to custom plaques, order your copy today!


