Btu Buddy 187: Pesky Refrigerant Leak
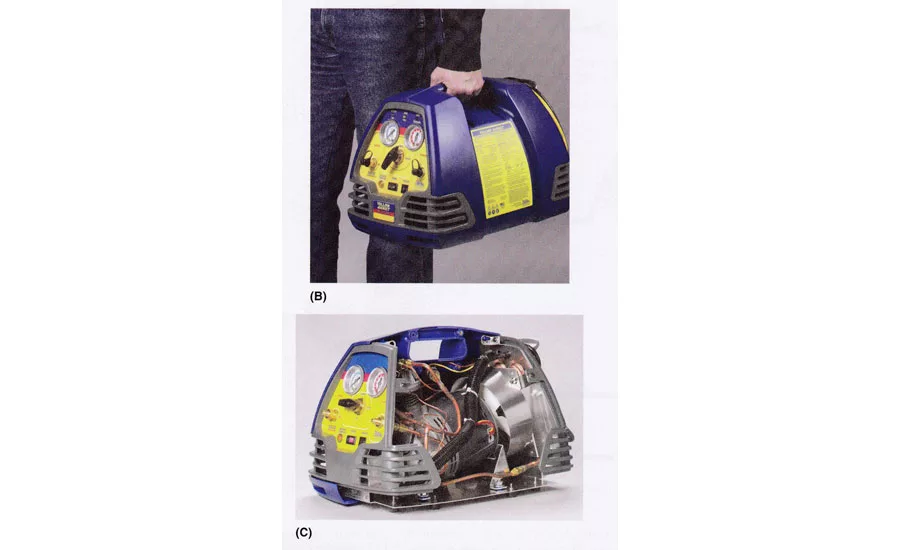
Figure 1: This is an example of recovery unit that is very portable. (Figures are from Refrigeration & Air Conditioning Technology, 7th Edition, by William Whitman, William Johnson, John Tomczyk, and Eugene Silberstein, published by Delmar Cengage Learning). (©Delmar Cengage Learning).
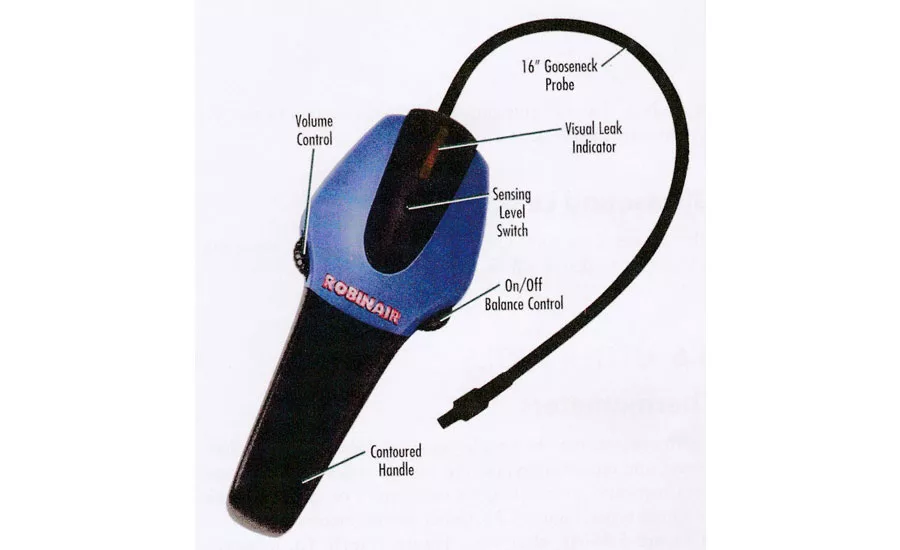
Figure 2: electronic leak detectors can detect very small leaks. The technician must learn the finer points of using these detectors. It takes time and patience to find very small leaks. (Figures are from Refrigeration & Air Conditioning Technology, 7th Edition, by William Whitman, William Johnson, John Tomczyk, and Eugene Silberstein, published by Delmar Cengage Learning). (©Delmar Cengage Learning).
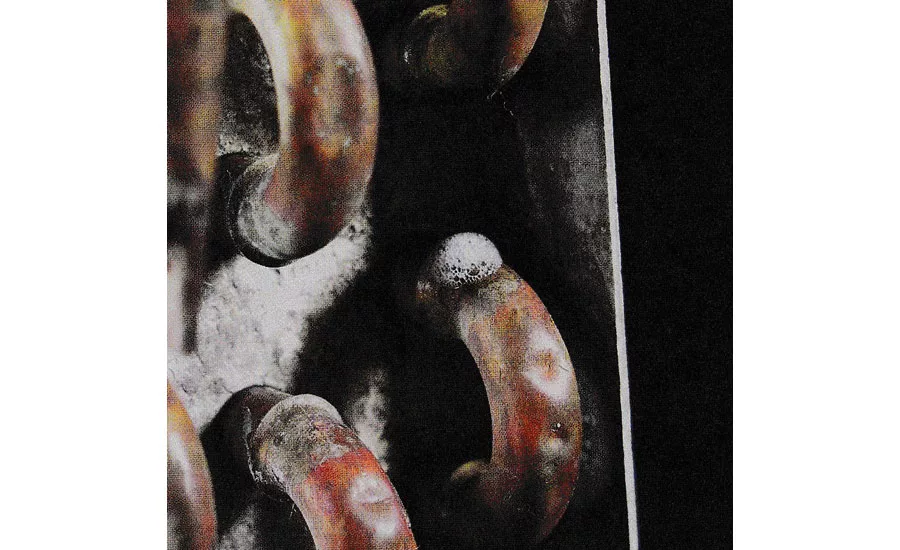
Figure 3: The bubble technology works really well for locating the exact location of leaks. The bubble material evaporates very slowly and is very elastic and can blow big as well as very small bubbles. (Figures are from Refrigeration & Air Conditioning Technology, 7th Edition, by William Whitman, William Johnson, John Tomczyk, and Eugene Silberstein, published by Delmar Cengage Learning). (©Delmar Cengage Learning).
Bob and Tim are on a service call with an aggravated customer. The customer explained to them three different service companies had been out to her house this summer and all of them told her that she had a leak they could not find.
“This is one of those situations that I don’t like to be in because I know that the leak is going to be hard to find,” Bob said to Tim. “Other technicians have tried and have not been able to locate it. One way to find the leak, and we will, is going to probably make the other technicians look bad in the opinion of the customer.”
Bob already explained to the customer that they were going to remove the refrigerant from the system, put a partial charge of refrigerant back into the system for leak checking purposes only, and that they would pressure the system to the maximum working pressure using nitrogen. He explained the leak could be found much easier using this method.
Tim set up the recovery machine and pulled the refrigerant out of the system, saving it in a clean recovery container (Figure 1). They then pressured the system up to 250 psig.
“We can comfortably pressurize the entire system up to 250 psig, including the compressor,” Bob explained. “Strange as it might seem, the compressor housing is the weak link in the system and most compressors are rated for 250 psig working pressure. As we are doing the leak check, we will watch the pressure and see that it maintains the 250 psig.”
This system was an R-22 system and they used electronic leak detectors to go over all of the connections on the condensing unit (Figure 2). They spent a great deal of time checking all of the piping on the condensing unit and the interconnecting piping to the house and to the evaporator section without finding any sign of a leak. They both spent about an hour leak checking the condensing unit and the field piping and were assured that there was no leak in this portion of the system.
“I feel good about this portion of the system and the pressure is actually dropping very slightly, so I believe we still have a leak,” Tim said. “The only thing we haven’t checked is the evaporator section and it is encased and insulated.”
Looking for quick answers on air conditioning, heating and refrigeration topics? Try Ask ACHR NEWS, our new smart AI search tool. Ask ACHR NEWS
“The evaporator section is insulated, but I think we’re going to have to remove some insulation and get inside to the actual coil,” Bob explained. “We can take a utility knife and cut an inspection hole in the insulation in front of the coil and hopefully, when we get inside, there will be an inspection cover that is screwed on that can be removed.”
They removed the insulation from the front of the coil and did find that there was an inspection cover that was fastened with sheet metal screws. They removed the screws and removed the cover.
“Hand me the electronic leak detector,” Bob said.
Bob passed the probe over the tube turns in the coil on the front side of the coil and found nothing. He was looking discouraged. This was an “A” shaped coil, and he was able to get the probe to reach the back side of the coil. When he did this, the electronic leak detector lit up.
“We found the leak, at least we know it is back there and we can’t see it,” Bob said.
“What are we going to do next to prove that we have a leak, and to prove where the leak is?” Tim asked.
“The coil slides into the coil casing,” Bob explained. “There is some slack in the refrigerant lines, so we should be able to slide the coil out the front of the casing and set it on top of something so that we can see the backside.”
They moved a table to the front of the air handler, put a stool on top of the table, and built the platform up to the level of the coil bottom. Then they slid the coil out of the casing and set it on top of the stool with the piping still in place. They were able to see the backside of the coil where the tube turns were on the backend of the coil. They used the electronic leak detector and determined there were several leaks on the backend of the coil. They were very small leaks, but leaks nevertheless. They used soap bubbles to narrow the leaks down to four different locations. The leaks were where the tubes came through the metal tube support sheets. They used their phone to take pictures of the bubbles forming so they could show them to the customer.
“Mild acid can form in locations like this and cause tube failure over a long period of time,” Bob said. “The equipment from years ago had extra thick copper cubes that were made from pure copper and this did not occur very often with older equipment. I suspect tubes today are thinner and made out of copper alloys, so we are seeing more tube failures just like we see here. The only answer is to change the coil. We can pinpoint these few leaks, but what you can bet on is that there are many more that are just about to break through and start leaking. The coil has to be replaced.”
Bob and Tim went to talk to the owner and Bob explained that changing the coil was going to be expensive.
“The refrigerant is R-22 and it is really expensive,” Bob explained. “This coil is rated for R-410A which is a higher pressure refrigerant so the coil is not very old. If we change this coil out and go back with R-22, it will always be expensive to add refrigerant. An alternative would be to change the coil and change the condensing unit for an upgraded modern refrigeration system. This would be much more expensive but probably longer-lasting.”
The owner said, “I want to just change the coil. The condensing unit is not that old and I don’t want to invest that much more money in this home that we may possibly move out of in the next few years.”
Bob and Tim now had their job cut out for them. They got on the phone and found a new coil and went to the supply house and picked it up. They went back to the job and discharged the nitrogen from the system.
They cut the piping at the evaporator, moved it back out of the way, and removed the old evaporator. They installed the new evaporator into the coil casing and reconnected the tubing. Then they went to the condensing unit, cut the liquid line, installed a liquid line filter dryer, and pressurized the system with a little bit of R-22 and nitrogen. They leak checked the four connections they had worked with, two at the evaporator and two at the filter dryer. They found no signs of leakage. This system had been leak check so many times that they felt like it was totally leak free so they connected the vacuum pump and pulled the system into a deep vacuum and charged the system with R-22. The old expansion device was still usable because the system was operating, so there was no need to change it. The system should be good for many more years.
Tim recapped the job that they had done today, “This was a little bit different from other service calls that we have been on. We replaced a major component within an older system. We could have changed the whole system, but the expense would have been considerably more. In this case we worked with the customer to give the customer what they really wanted, a good repair on older system that showed no other signs of deterioration. I think that was a good financial decision.”
“We always want to try to do the best we can for every customer,” Bob said. “Installing a new system was no big guarantee that it would last any longer than the old system is going to last. The big difference was the potential for loss of refrigerant in the future and the fact that R-22 refrigerant would be much more expensive in the future. People think that R-22 is going to disappear in a few years when they quit manufacturing it, but that is really not the case. There will be recovered and recycled refrigerant for many more years. Technicians are going to just have to make sure the systems are really tight and leak free because of this very expensive refrigerant. Having talked to some of the old time service technicians, they remember when refrigerant was expensive in the past, and they made sure their systems were really tight and leak free before they released them to the owner. As years went by, refrigerant became less and less expensive until technicians became careless with their workmanship and just started adding refrigerant instead of stopping and making sure the leaks were repaired. The industry has had good leak detection equipment for many years, detectors that can detect leaks down to ¼ ounce per year. They are a good investment for the technician. Technicians need to take the time to learn how to use them professionally. I have seen technicians just wave the detector sensors around and think they are detecting leaks. They need to learn how to take their time and methodically check every possible place a leak could occur.”
“I have watched you through the leak detecting process and have noticed that you go very slowly over every joint and connection and every possible place the system could leak,” Tim said. “Thanks for passing the experience on to me.”
Publication date: 10/22/2018
Want more HVAC industry news and information? Join The NEWS on Facebook, Twitter, and LinkedIn today!
Looking for a reprint of this article?
From high-res PDFs to custom plaques, order your copy today!


