Btu Buddy 157: The First No Cooling Call of the Year
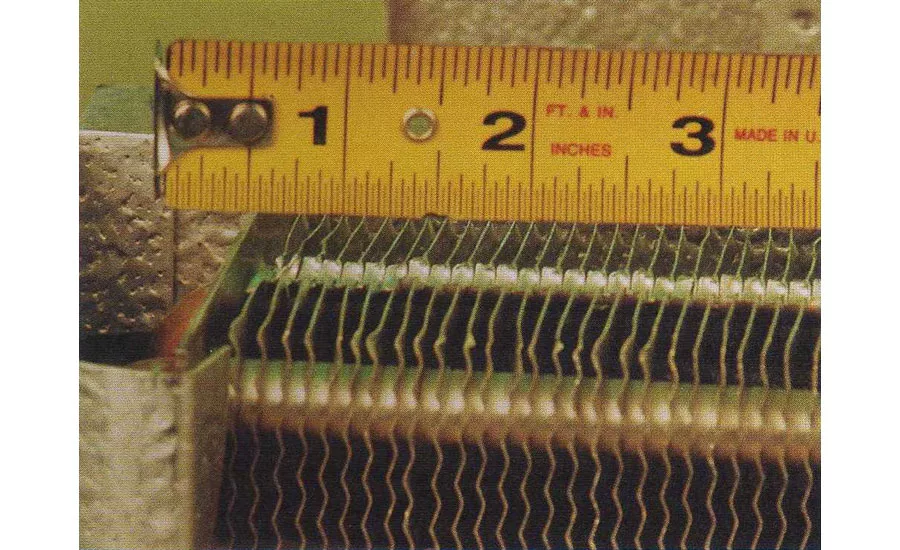
FIGURE 1. This photo shows a top view of a finned copper and aluminum coil. Bob eased a flat blade screwdriver between the fins and forced them sideways to reveal the copper coil and make the repair. (Figures are from Refrigeration & Air Conditioning Technology, 7th Edition, by William Whitman, William Johnson, John Tomczyk and Eugene Silberstein published by Delmar Cengage Learning.) (©Delmar Cengage Learning.)
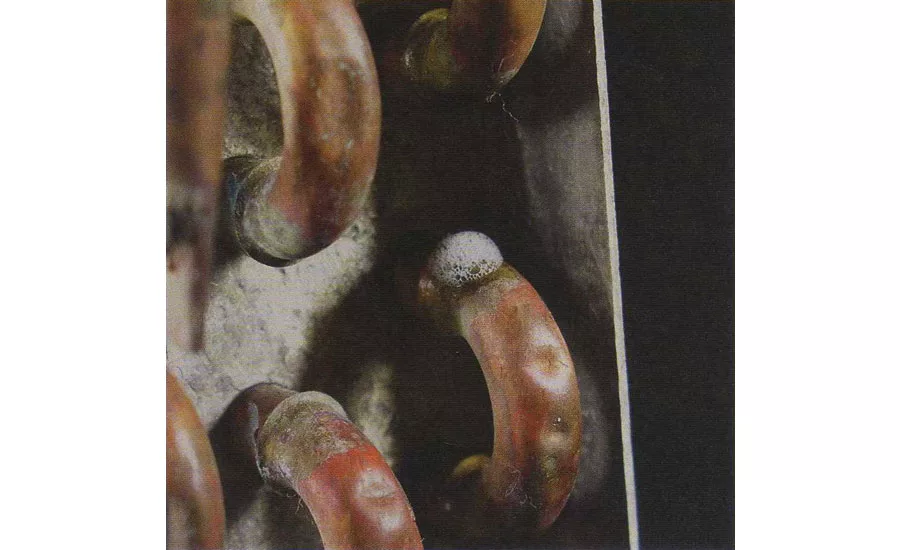
FIGURE 2. This is an example of a soap leak test with micro-bubbles showing a very small leak. This kind of soap leak test works well because the soap does not dry out quickly. (©Delmar Cengage Learning.)
Bob is a service technician who is well trained and nationally certified. However, he has sometimes suffered from the same confusion that all technicians occasionally do — the facts that he gathers may or may not point to the obvious cause of the problem or the best solution. But Bob has had something that no one else has. He recalled his long-time HVACR mentor and imagines him accompanying him as “Btu Buddy,” someone who reminded him to take time to stop and think before rushing to judgment, helping keep him on the right track, even with facts that are confusing.
Now, Bob’s company has promoted him to help train a new employee, right out of a school specializing in HVAC, just like Bob was. Bob is now Tim’s Btu Buddy. Tim is anxious to travel with Bob. Tim realizes that he is right out of school, with the theory and lab work that he accomplished in school, but still needs help. He knows that he worked with many of the components of the systems in the school, under ideal conditions with good light and air conditioning. Now it is into the field, sometimes under the house with poor lighting, or out on the rooftop in the sun, where the real action is. He is naturally and normally reluctant, but he has Bob to help guide him.
Bob and Tim had just arrived at the house of a new customer who explained that the air conditioning system was not working. The homeowner said that they had just had a warm day and the air conditioning system did not come on when they tried to cool the house down yesterday. Tim set the thermostat for the air conditioner to start and Bob and Tim went to the air handler to see what they could discover. They found the air handler was running, but the suction line was not cool at the air handler so it appeared that the condenser wasn’t running.
Bob said, “Let’s go out to the condensing unit and see what’s going on.”
When they got to the condensing unit they noticed that it was not running and Tim said, “The thermostat was calling for cooling and the indoor fan was running like it should be and the condensing unit is not running. Something is wrong out here. I’ll get the meter and the gauges and we’ll find out what’s happening.”
Tim took the cover off to the control wiring and said, “There is a signal here calling for cooling but the unit is not running. It must be something inside the unit that is keeping it from running.” They looked at the wiring diagram and Bob explained that they should check power across the low-pressure control to see if it had an open circuit.
Tim checked the circuit across the low-pressure control and sure enough the low-pressure control contacts were open. That would explain why the condensing unit wouldn’t start so Tim told Bob he was going to put gauges on the unit to see if there was pressure in the system. When they got the gauges installed, they discovered that the pressure inside the unit was zero. They put a little bit of refrigerant in the system to see what they could find out and they heard a leak. They examined the condensing coil and found a rock had knocked a hole in one of the lower condenser tubes.
Looking for quick answers on air conditioning, heating and refrigeration topics? Try Ask ACHR NEWS, our new smart AI search tool. Ask ACHR NEWS
Tim said, “The condenser tube has hole in it and it looks to me like it is in a place where it would be very hard to repair. This is a fairly old system from just looking at it. We could get a new condenser coil and just install the coil but that would be a major repair for the system. It might be cheaper to explore installing a whole new system.”
Bob said, “At least the coil is copper and easy to work with should we choose to repair. We need to go up and talk to the customer about options.”
The husband and wife were both home this morning so Bob and Tim went up to talk to them about different possibilities. Bob explained to the customer, “We have options with your unit. A rock from a lawnmower last fall punctured the outdoor condenser coil. Your unit is getting fairly old, so you may want to consider replacing the system. That would be the most expensive but the longest lasting solution. There is the option to buy a new coil for the outdoor unit and that is quite an extensive repair on an old piece of equipment. That would cost less than a new unit. But there is a possibility that a new coil is not available for this old unit. There is the possibility that we may be able to repair that coil, but it’s quite a difficult repair because of where the leak is; it’s about 3 inches off the ground and it’s under the fins that cover the copper coils. I believe that we can make a repair if that’s what you desire, but in the event that we can’t repair the coil, it will not be usable and we will have to drop back to one of the first two options. The third option is the least expensive and I believe we can do it. So consider: new unit, new coil, or repair the old coil.”
The homeowner said, “Finances are not great right now so we would like to pursue repairing the coil.”
Bob and Tim believed the unit to be about 10 years old, but thought they should be able to get another 10 years out of it if it could be repaired. The advantage, of course, of putting in a new unit is high efficiency. By keeping the old unit for another 10 years, the homeowner would pay more in utilities, but it is still a good, viable option. So they believed weighing the difference of a new unit versus a repair on the old coil were the best options.
Bob said to Tim, “Let’s get started on repairing the old coil. Get the small torch, the hand tool pouch, and a small hammer.”
Tim asked Bob, “What is going to be the procedure for this repair?”
Bob said, “There are two things we have to be very aware of while making this repair. One is the location. It’s very close to the ground and we have to get perfect access to that leak. The other is we have to remove the fins over the leak area and do some high temperature soldering or brazing to the leak. That condenser tube is copper and it is not the conventional copper pipe that we normally braze. This tube is very thin for good heat exchange and it is surrounded by the copper fins which give it support so it doesn’t have to be quite as thick as piping that you would run across a wall to carry refrigerant. It is so thin that when you start brazing it’s easy to blow a big hole in the tubing. The hole would not be repairable.
“Hand me a flat blade screwdriver and that small hammer and I will show you how we get access to the leak (Figure 1).”
Bob gently inserted the screwdriver blade between the fins right next to the leak and took the hammer and gently tapped the side of the screwdriver blade which forced the fins to move away from the leak area. The fins actually compacted against each other. Then he turned around and tapped the fins back in the other direction and revealed the hole that was quite easily seen. The hole was about the size of a needlepoint so it looked like it would be easy to patch.
Tim opened the gauges to the unit so that there was no pressure inside the coil. Bob sanded the area around the leak to get it very clean then applied a small amount of flux and using the torch he gently heated the area around and over the leak. When the pipe was the correct temperature he then applied a good spot of solder over the leak hole. It looked like a perfect repair.
Tim said, “It seemed like it took an awful lot of heat for that one drop of solder.”
Bob said, “It does take up an extra amount of heat even though this pipe is very thin. The problem is that the fins around the area of the leak will suck all of the heat away from the place you’re trying to repair. Before you know it, you will overheat the area and blow a hole in it if you’re not very careful and experienced in doing this repair.
“This system has been, for all practical purposes, open to the air for a long time. We don’t know when the leak occurred. The leak is very small, but of course what happens is during the daytime when the daytime air heats up, it heats the coil and gases that are inside the coil are pushed out through the leak hole. Then at night when it cools off, the gases inside the coil contract and suck air in through that small hole. That doesn’t sound like it could cause a problem, but over a period of months it will draw contaminants into the unit.
“We will need to first pressure up the system with nitrogen and check that leak area where we repaired it with soap bubbles (Figure 2). Then we will need to let the system pressure down to atmospheric pressure level and pull a deep vacuum on it. After reaching the deep vacuum we will let it sit for a few minutes to make sure that we don’t have a leak somewhere else in the system that will show up on our vacuum gauge. Then we will pressure the system back up with dry nitrogen and change the liquid line drier. Then we will evacuate the system to a deep vacuum again and then we will be ready to charge the system.”
They pulled the first vacuum on the system and brought the system back up to atmospheric pressure and changed the dryer then reconnected the vacuum pump and started the second deep vacuum. They had some time to spare so they went to another service call and ate lunch and let the vacuum pump just run. They had explained to the homeowner that they were going to another call while this vacuum was being pulled.
About three hours later they came back to the job and were ready to charge the system. They measured in the correct amount of refrigerant and started the system and checked the pressures. Everything seemed good.
Tim then asked, “Why did we pull that first vacuum? Why didn’t we just put the dryer in and save that time?”
Bob explained, “The system probably had some moist air in it and I did not want to spoil the dryer’s effect by using it up on the moist air. It’s much more cost effective to run a vacuum to pull that atmosphere and moisture out and then change the dryer and let it do its work. The dryer likely now has almost maximum capacity since we took that step to pull the moisture-laden air out of the system before installing the dryer. This system uses R-22 and it is more forgiving with moisture than some of the more modern refrigerants and oils.”
Tim said, “That’s a good point. There are a lot of details in this business when it comes to doing good service work and I am glad that I’m able to work with someone who’s trying to do all the right things for the customer. That was cost effective for the customer and the customer won’t forget that when it comes time to put in a new system. You also made the customer aware of the options and willingly did the option that the customer chose.”
As they were putting the tools away, Bob said, “You’ll never be sorry for doing the job right, and doing the job right involves being fair to the customer from a cost basis and from a technical basis.”
Publication date: 4/18/2016
Want more HVAC industry news and information? Join The NEWS on Facebook, Twitter, and LinkedIn today!
Looking for a reprint of this article?
From high-res PDFs to custom plaques, order your copy today!


