How to Safely and Accurately Replace a Condenser Fan Motor
Contractors can be thrown off by the fact that OEM motors have three wires while aftermarket motors have four wires
Replacing a condenser fan motor on HVAC equipment is a relatively simple job for technicians, but it’s always good practice to review the steps to make sure it’s done properly and safely.
The most important thing to know is how to avoid electrical issues that could have serious consequences to your technician’s safety during installation or cause a short out later.
Contractors can be thrown off by the fact that OEM motors have three wires while aftermarket motors have four wires. The leads are different colors as well. The advice offered in this article includes how to safely wire the motors and what to know about the wire colors.
Installation steps for a typical condenser fan motor
After troubleshooting the system and diagnosing that the motor needs to be replaced, follow these steps.
Removal of motor
- Begin by turning off the power to the system at the electric panel. Pull the disconnect at the outside unit for safety.
- Remove screws to gain access to the electrical connections. Verify that no voltage is present with your multimeter or tester.
- Before disconnecting any wires, make note of their locations or take photos. This can help when wiring the replacement motor.
- Disconnect the motor leads from the contactor or defrost control board if you are working on a heat pump, and the capacitor. Caution: Make sure to discharge the capacitor to prevent accidental shock.
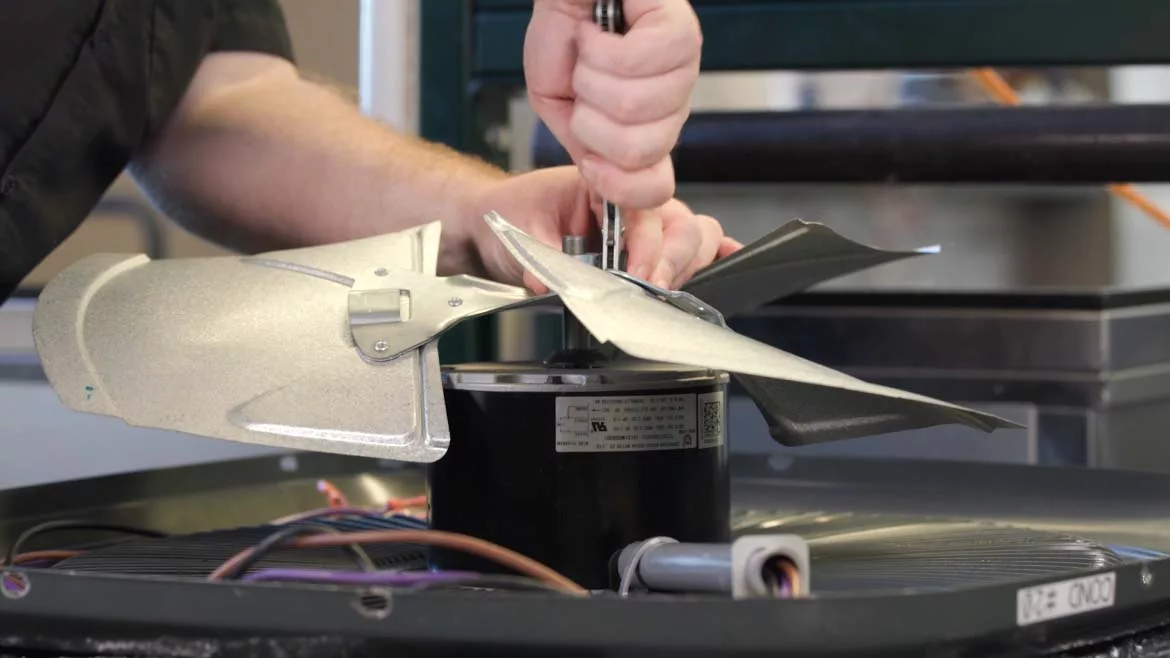
- Guide the wires out of the connection location and remove them from any conduit protecting the wires leading to the motor attachment point. Remove the top condenser grate that holds the motor. Place it upside down on the ground and inspect the fan blade for any damage.
- Remove the fan blade from the motor by loosening the set screw. If damaged during the removal process, replace the fan blade, making sure it has the exact same number of blades, diameter, and pitch angle.
- Turn the cover over and remove the nuts that attach the motor to the cover. Make note of the location of the wires and the conduit as you remove the old motor, so you know the correct location for the new motor wires.
CHECK FOR DAMAGE: When removing the old motor, inspect the fan blade for any damage. (Courtesy of NIDEC)
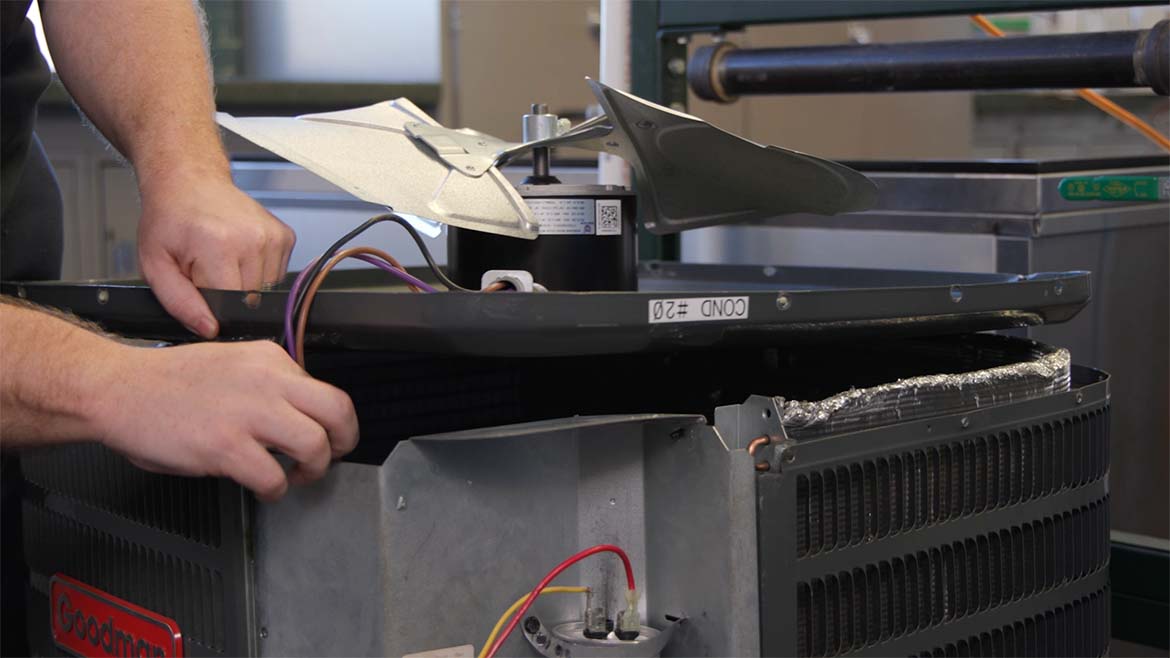
Mounting the new motor
The most common type of mounting is four through-bolts to the condenser cover grate. Verify the replacement motor you are installing has the correct mounting for the system you are working on.
- Mount the motor to the cover, remembering the location of the conduit as noted above.
- Always rerun the wires through the conduit. A grounding lead is included and can be used if needed, but most units are grounded via the condenser cover grate.
- Remember to remove the drain plugs from the end shield pointing downward when installed. (Shaft end for shaft down applications.)
- Verify the direction of rotation. The motor’s rotation can be changed by simply reversing the connection of the reversing leads. Ensure these leads are secured in a safe location, not sticking out of the top of the grate, or interfering with the fan operation.
- Install the inspected or new fan blade, verifying the fan is in the same location when it is placed in the shroud. Place the motor and cover on top of condenser. Run the wires back to the electrical box on the unit.
Wiring the new motor
Single-speed condenser motors have one speed lead, making them simple to wire. The high-voltage (typically black) lead will go to the L1 high side of the contactor or defrost control board on a heat pump. The white (sometimes yellow) lead goes to the L2 side of the contactor or the common terminal on the dual capacitor.
Best practice is to always use a new capacitor when you replace a motor.
Steps:
- Verify the microfarad rating matches the required rating for both the motor and compressor. Most OEM’s have 3-wire installation (high voltage, common, and capacitor). Aftermarket motors have 4 wires (high voltage, common, and two capacitor leads: brown and brown with a white stripe).
- Wire the black to L1 side of the contactor.
- Wire the white or yellow common to the common on the capacitor.
- Wire the solid brown to the fan side of the capacitor.
- The brown with the white stripe wire gets trapped off and is not used.
- Using a separate capacitor for the motor is also acceptable; however, make sure the cap is mounted in the weather-protected area.
- Reattach the cover to the condenser unit and power the unit on to verify operation. Airflow direction is up through the top and not sucking back down. Confirm amp draw is within 10% of the motor nameplated value.
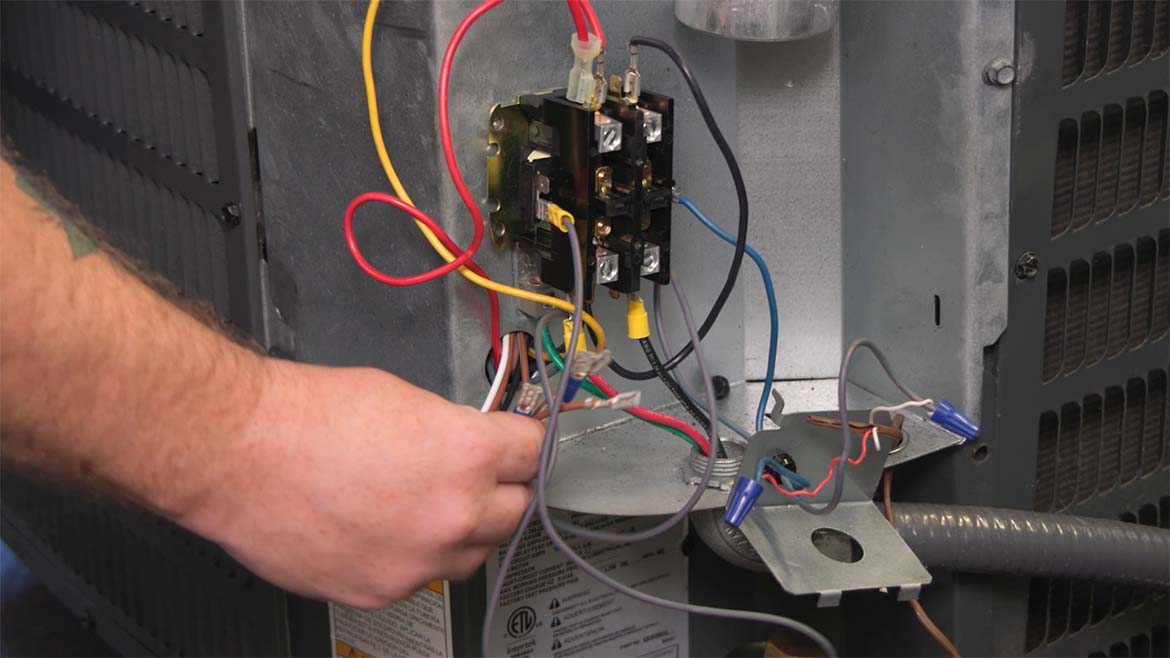
RATE THE RATING: Before wiring the new motor, verify that the rating matches the required rating for both the motor and compressor. Most OEM’s have 3-wire installation while aftermarket motors have 4 wires. (Courtesy of NIDEC)
Following these steps with an eye to safety will ensure a successful fan motor replacement while also keeping technicians safe and providing optimal motor performance.
Watch this video that shows each installation step.
Looking for quick answers on air conditioning, heating and refrigeration topics? Try Ask ACHR NEWS, our new smart AI search tool. Ask ACHR NEWS
Looking for a reprint of this article?
From high-res PDFs to custom plaques, order your copy today!


