Btu Buddy 176: Leaking Heat Pump

Bob is a service technician who is well trained and nationally certified. However, he sometimes suffers from the same confusion that all technicians occasionally do — the facts that he gathers may or may not point to the obvious cause of the problem or the best solution. But Bob has had something that no one else has. He recalled his long-time HVACR mentor and imagined him accompanying him as “Btu Buddy,” someone who reminded him to take time to stop and think before rushing to judgment, helped keep him on the right track, even with facts that are confusing.
Now, Bob’s company has promoted him to helping train a new employee, right out of a school specializing in HVAC, just like Bob was. Bob is now Tim’s BTU Buddy. Tim is anxious to travel with Bob. Tim realizes that he is right out of school, with the theory and lab work that he accomplished in school, but still needs help. He knows that he worked with many of the components of the systems in the school, under ideal conditions with good light and air conditioning. Now it is into the field, sometimes under the house with poor lighting, or out on the rooftop in the sun, where the real action is. He is naturally and normally reluctant, but he has Bob to help guide Him.
Bob and Tim are on their first service call for winter. They are at a retail store that has 4 units to heat and cool the store. They are all 15 on heat pumps. One area of the store is not heating or cooling well and during the heating cycle, the heat pump auxiliary heat light is staying all for long lengths of time. This signals that the unit is operating on auxiliary or strip heat and not on the heat pump. Strip heat operation is of course much more expensive than heating the store with the heat pump.
They talk to the dispatcher back at their office and asked for the dispatcher to look up the service records for the store. The dispatcher got back to them and told them that this one particular unit that they were to work on had a history of losing refrigerant in the past. It had several leaks that had been repaired in the past.
They are on the roof and have determined that the unit does not have an adequate charge. The unit has some refrigerant in it but the charge is very low.
Bob said, “turn off the unit with the disconnect and let’s see what we can determine. The unit has enough refrigerant in it for a leak check so let’s get the leak detectors and start looking.”
Tim asked, “how do you know it has enough refrigerant for a leak check”?
Looking for quick answers on air conditioning, heating and refrigeration topics? Try Ask ACHR NEWS, our new smart AI search tool. Ask ACHR NEWS
Bob said, “the unit was in the heating cycle when we got on the roof because the outdoor coil has ice build up on it for the first third of the coil. The ice buildup shows you that there is liquid refrigerant inside the coil.”
Tim asked, “why don’t we put gauges on it and see what the performance level of the heat pump is”?
Bob explains, “it is not a good idea to just put on a set of gauges on a piece of equipment that you know is leaking. The first thing to determine is if there is enough refrigerant in the unit to build up enough pressure for a leak check. The leak is often times around the service port. It is very common for a service technician to just remove the gauges from a system after a service call and leave a leak at the service connection because the technician did not leak check the final exit point of the unit, the service connections. Now let’s take the top off of the unit so that we can get to all of the connections and piping”.
By the time they removed the top of the unit the pressures internally inside the unit had equalized so that there was pressure on the low side and pressure on the high side of the system.
Tim started up his electronic leak detector and checked the service ports and found them to be leak free. He then reached over inside the unit and said, “there seems to be refrigerant in the air in here.”
Bob explained, “start on the highest piping inside the cabinet with your leak check and work your way down. Refrigerant is heavier than air and should settle quickly to the bottom of the unit once it has leaked into the atmosphere”.
Tim then said, “there is so much refrigerant in here that I’m getting a reading everywhere I put the sensor. I have turned the sensitivity down but there is still refrigerant everywhere I put my sensor”.
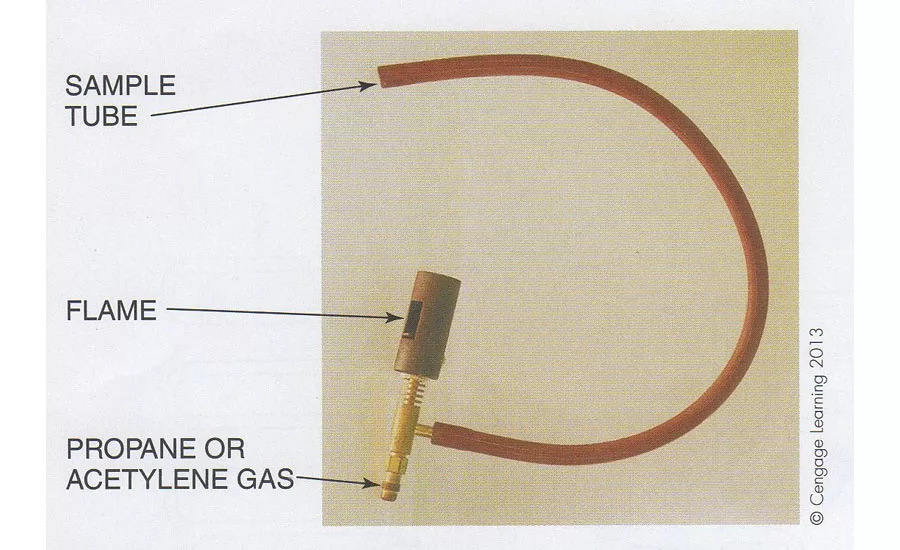
Bob said, “go to the truck and get the old fashion halide torch, (Figure 1). It is not very sensitive and we should be able to narrow the leak down using that detector”.
Tim returned with the halide leak detector which was powered with a propane handheld cylinder. He then proceeded to look for the leak with the halide detector. When he neared part of the piping the halide detector flame turned blue. He then said, “I think I am in the vicinity of the leak”.
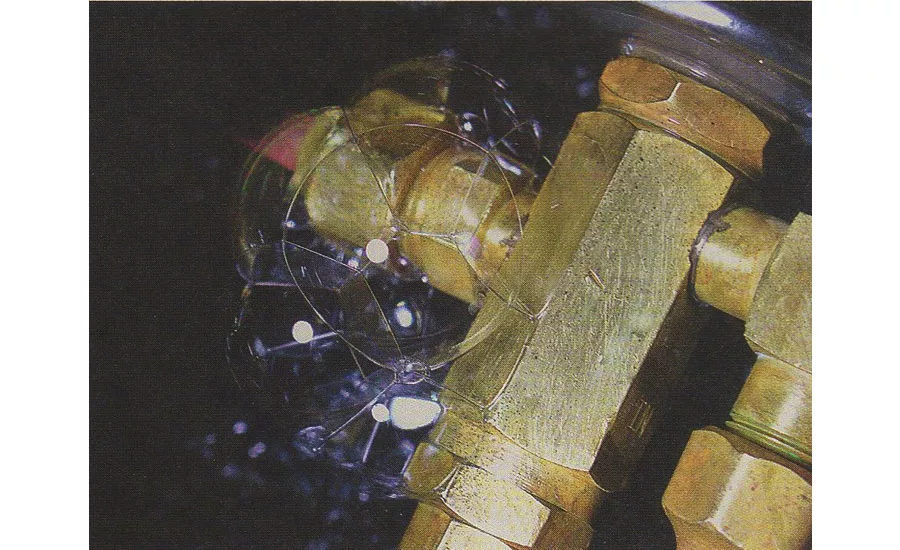
Bob then said, “you’re going to think this is funny but try this, lick the back of your hand and turn it towards the piping and see if you feel anything. What this will do is turn your hand cool when you get close to the vapor coming out of the leak. This was one of the first leak detection methods. The first line of leak detection methods is your ears, then use the damp hand method. When you are very close get the leak detection liquid out of the truck and we will paint some of the pipe with this leak detection liquid”. (Figure 2)
Tim then asked, “what kind of liquid is this leak detection liquid”.
Bob explained, “we used to use Joy dish soap for this type of liquid and it would blow bubbles, but dish soap evaporates fairly quickly. Then we learned to add glycerin to the dishwashing soap which made it thicker and blow bigger bubbles more slowly. Manufacturers have developed new liquids that blow slow bubbles called microbubbles and the connections that you are leak checking will stay wet longer, prompting more bubbles”.
Tim started looking around much closer and found where two pipes were rubbing together and had eventually rubbed a tiny hole in one of the pipes. When he applied the leak detection liquid to it a huge bubble formed. He then said, “we have found a leak, these two pipes have been rubbing together”.
Bob then said, “this system has a history of losing refrigerant in the past. I’m going to make the decision to repair this leak and put this system under a 24 hour pressure test to make sure that there are no other leaks. The other question I have in my mind is why these pipes rubbed together like they did. There should not be that much vibration in the unit, we may have some other type of problem with the unit. Get the recovery system and let’s recover the refrigerant from the system”.
They recovered the refrigerant from the system and separated the two pipes and repaired the leak with silver solder. Tim then used a rag to wipe the leak check area clean. he then got a cup of water and rinsed it off and wiped it again. This would prevent that area from gathering high levels of dust and looking oily which would indicate another leak. Then they used dry nitrogen and pressured the system up to 150 psig and marked the pressure on their gauge. (Figure 3) During the recovery process they replaced the top on the unit.
Bob then said, “remove the coil wire from the compressor contactor so that the compressor will not start and then start up the unit. All of the fans should come on and we will check the performance of the fans. We may have a fan that is out of balance causing vibration”.
They started the unit and went to the three individual fans and Tim said, “this fan seems to have a lot of vibration in it, I wonder why”?
Bob said, “remove the fan guard on that fan and let’s examine the blades”.
They turned the unit off with the disconnect and removed the fan guard and looked at the fan blade. One of the blades was loose on the fan hub. Bob said, “let’s order a new fan blade for this one fan and I think we will have solved the vibration problem and probably future leak problems from vibration”.
Bob and Tim went to the manager of the store and explained, “this unit has another leak that we found and repaired. This system has had several leak repairs in the last couple of years and lost quite a bit of refrigerant. We want to give this unit a 24 hour standing pressure check before we add refrigerant back to the system. We found the probable cause of the current leak, which was a fan blade that was loose and causing excess vibration in the entire unit. We have ordered a new fan blade and we will have it when we come back day after tomorrow to make sure the standing leak check held. If the leak check holds, we will recharge and start the unit and expect it to be leak free for a long time. The other three units in your store should keep the conditions in the store with in reason. It’s cool outside but not really cold so there shouldn’t be a big imbalance in temperature in the store”.
Bob and Tim returned in two days and went to the rooftop. The temperature was the same as when they put the pressure into the system and pressured it up to 150 psig. The pressure was still holding exactly where they left it. They fastened their vacuum pump to the system and started it operating while they changed the fan blade on the fan that was vibrating. They started up the unit fans to see how they operated and noticed that the fans were not vibrating. They were running very smoothly.
They pulled a vacuum on the system down to 300 microns and shut the valve to the vacuum pump and left it under a standing vacuum for 30 minutes. The vacuum gauge still indicated 300 microns. They determined that the system was ready to charge and start.
They weighed the charge into the unit as per the nameplate charge recommendation. Then they started the unit with the compressor and fans running and disconnected their gauges.
Bob said, “leak check around the gauge ports to make sure that we didn’t leave a leak behind us when we sealed the service ports”.
Tim then asked a question, “why did we use exactly 150 psig for the pressure check for the system”.
Bob explained, “most systems have a working or test pressure of 150 psig. You can also go to the unit nameplate and use the test pressure that they recommend on the unit nameplate which will be higher for the more high-pressure refrigerants. But when you apply pressure to a system you are applying pressure to the entire system and you don’t want to apply pressure any higher than the weakest link in the system which is usually the compressor housing. It’s a common misconception that because a compressor may have a 250 psig head pressure while operating that you can use that for the test pressure. This is not the case because the compressor is typically a low side pressure device. The only portion of the compressor that would be subject to the 250 psi pressure would be just the head inside the compressor shell and the piping to the outside of the compressor shell. The compressor shell is the weak link in the system and it is considered a low pressure device. So you can’t go wrong with using 150 psig as that is enough pressure to leak check a system in most cases”.
They had left the job and were on their way to another service call and Tim commented, “I think we left that system in factory ready condition. I’m satisfied we did everything we could to make that unit reliable until some other problem comes up”.
Publication date: 11/17/2017
Want more HVAC industry news and information? Join The NEWS on Facebook, Twitter, and LinkedIn today!
Looking for a reprint of this article?
From high-res PDFs to custom plaques, order your copy today!


